Quantum War
Top-down Shooter Game
Project Type: University

Software/Language Used: Unreal Engine / Blueprint(C++)
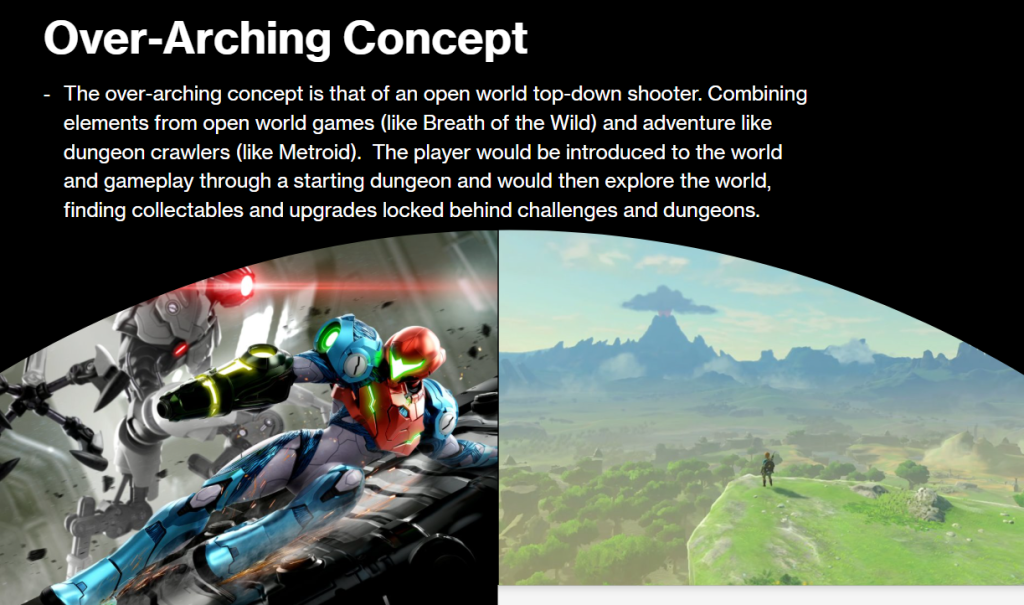
Quantum War is a Top-down Shooter that uses elements of dungeon crawlers in its first level to introduce the player to the mechanics of the game and the thematic Journey they will go on.
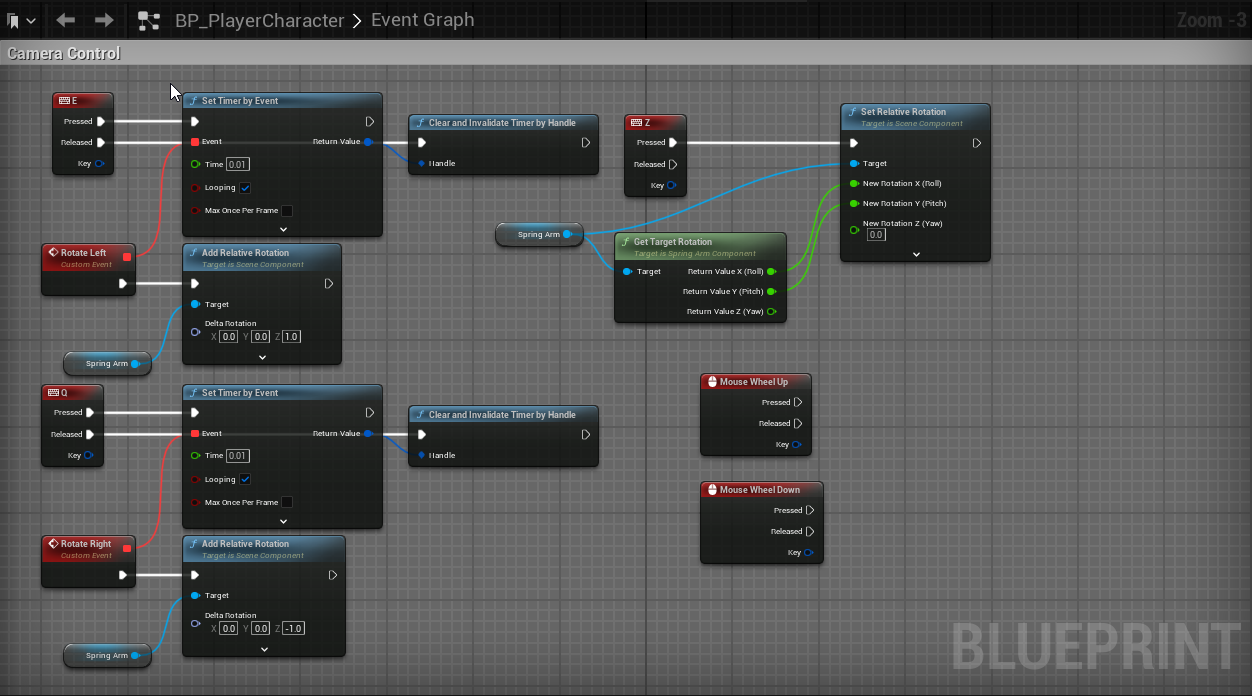
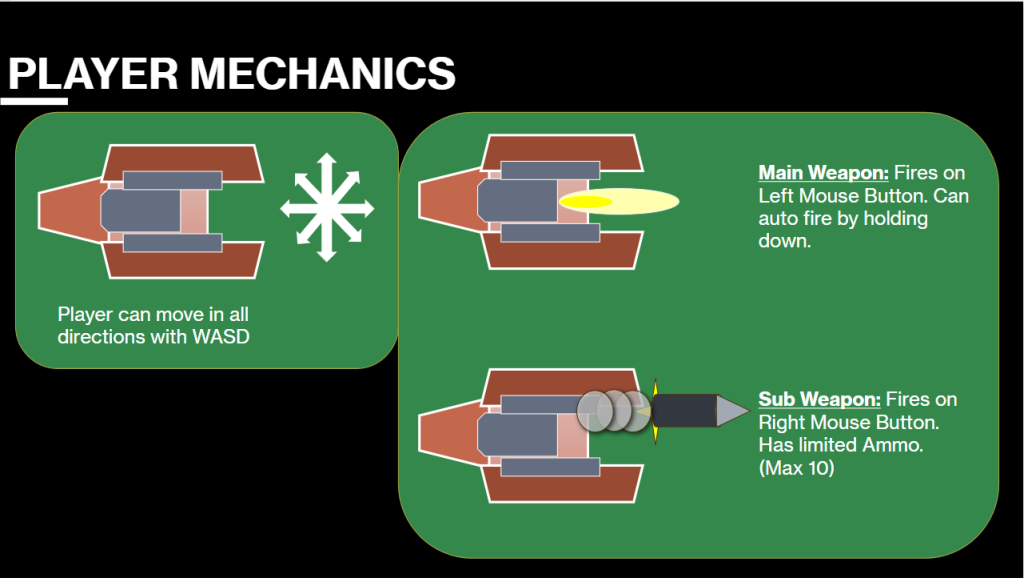
Player Controls
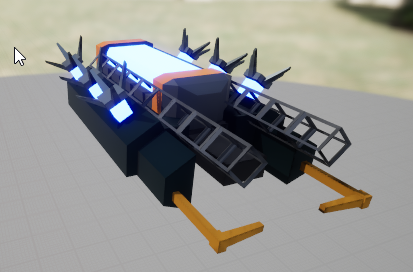
In this game, the player controls a tank made up of a body and turret. The turret rotates according to the players mouse potition in relation to the body. When the player moves, the body rotates to point in the direction of movement. The camera follows the player at a fixed distance and can be rotated around the player to a point and also reset to its original rotation (with the Y-axis to be specific). Lastly, the player can left click to fire their weapon and right click to fire a missile.
Weapons
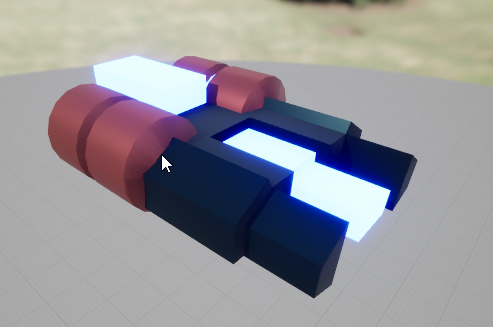
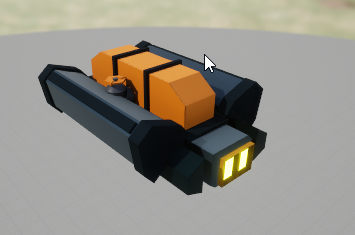
The player has several weapons available. These weapons appear as pick ups and will swap the appearence of the turret on the player tank.
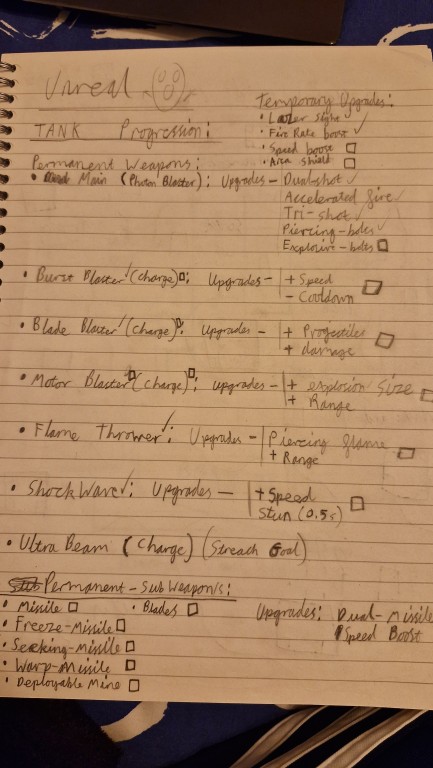
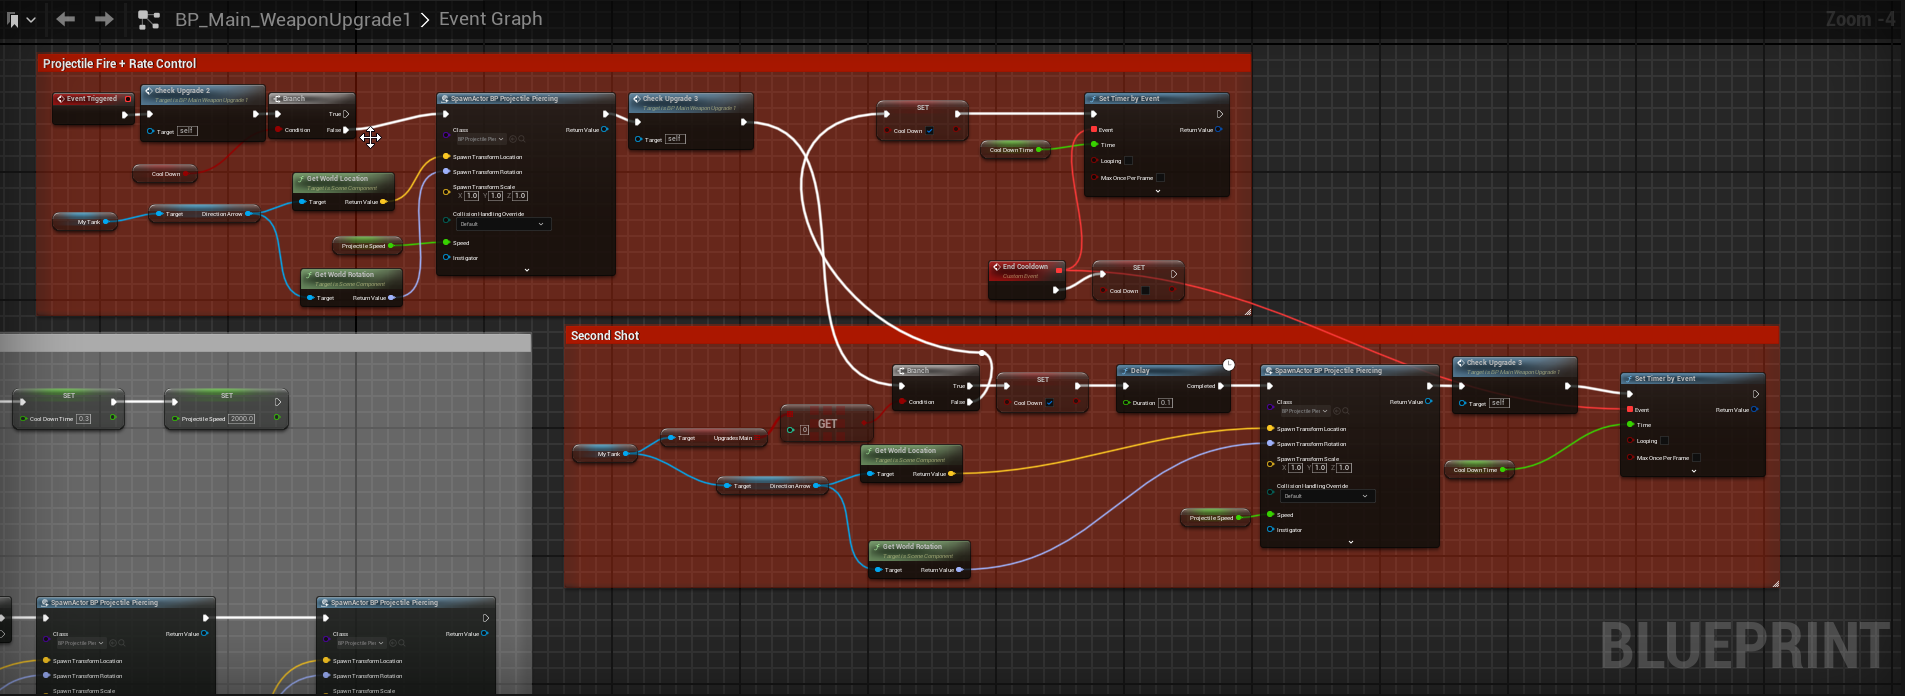
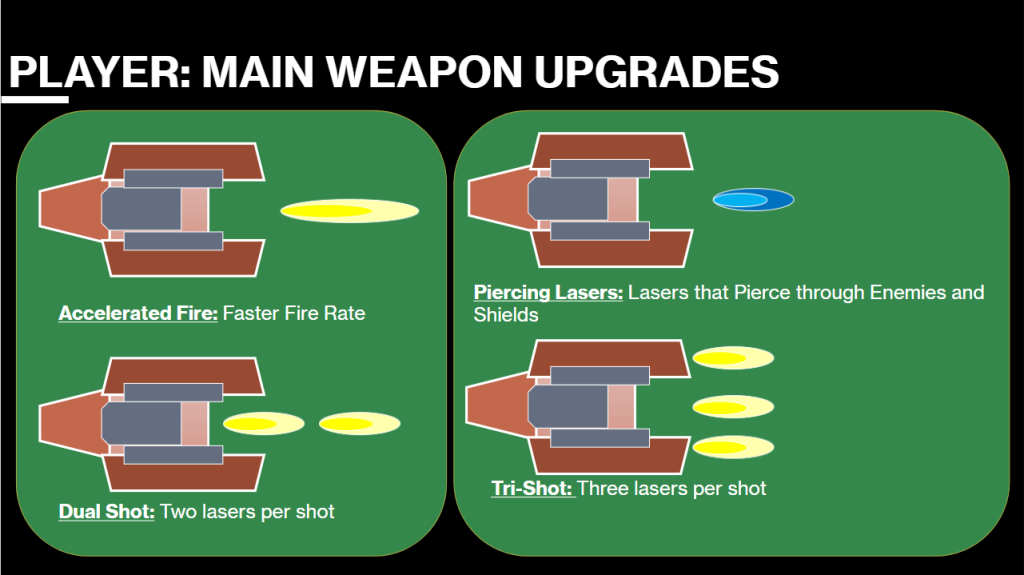
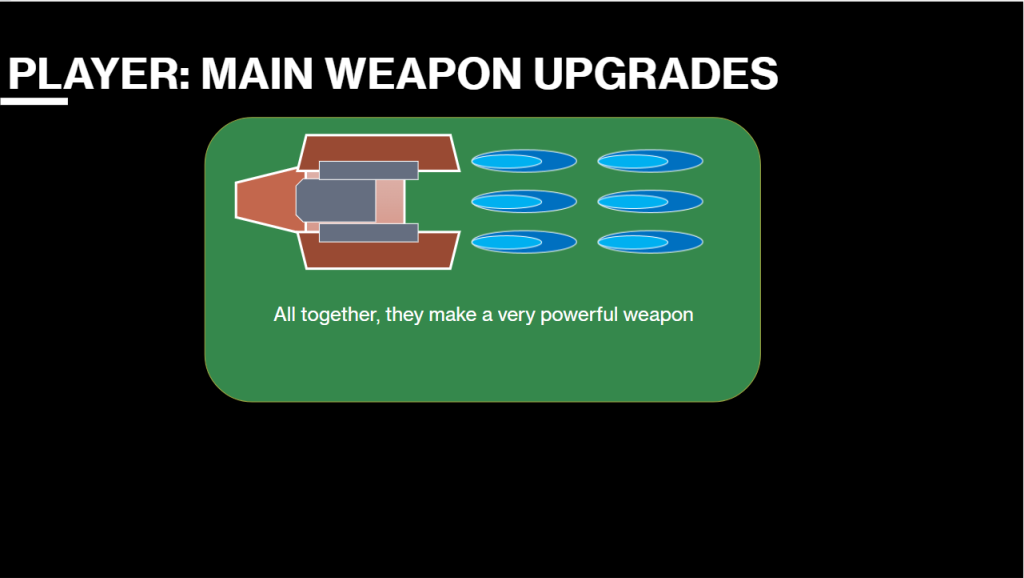
First is the Main weapon.
This weapon has standard fire rate and projectile but also has 4 different upgrades that gradually make it stronger. These upgrades are obtained as followed:
- Accelerated Fire: Faster fire rate.
- Dual Shot: Two projectiles are fired for each shot.
- Peircing Shot: Projectiles pierce through enemies and shields.
- Tri Shot: Each projectile also has projectile either side of it.
The blueprint below shows the main weapon's firing blocks.
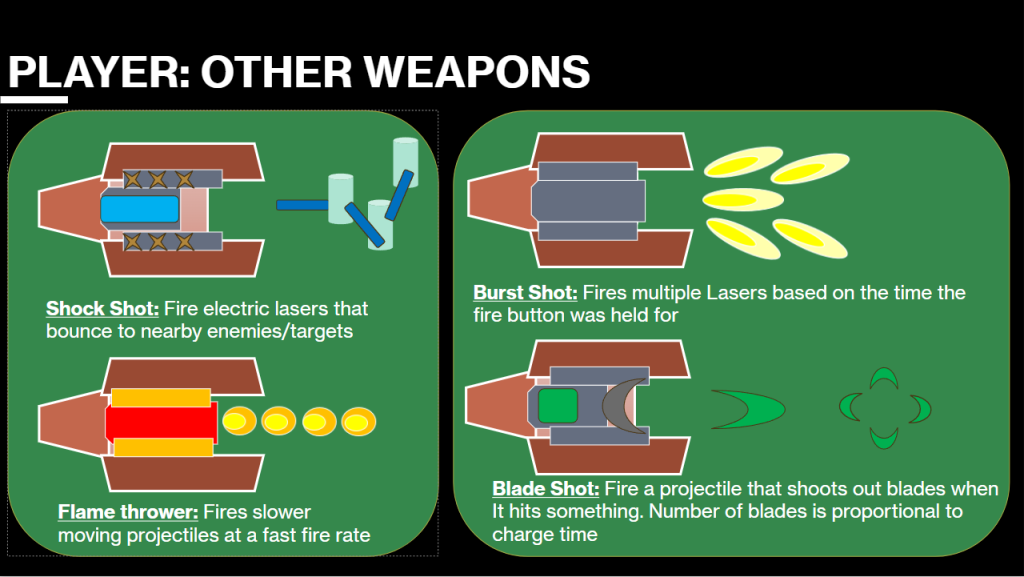
Next is the Shotgun weapon.
This weapon fires several projectiles with a short range and also features a charge mechanic where the number of projectiles increaces the longer the fire button is held (to a maximum).
The blueprint below shows the Shotgun weapon's charging blocks.
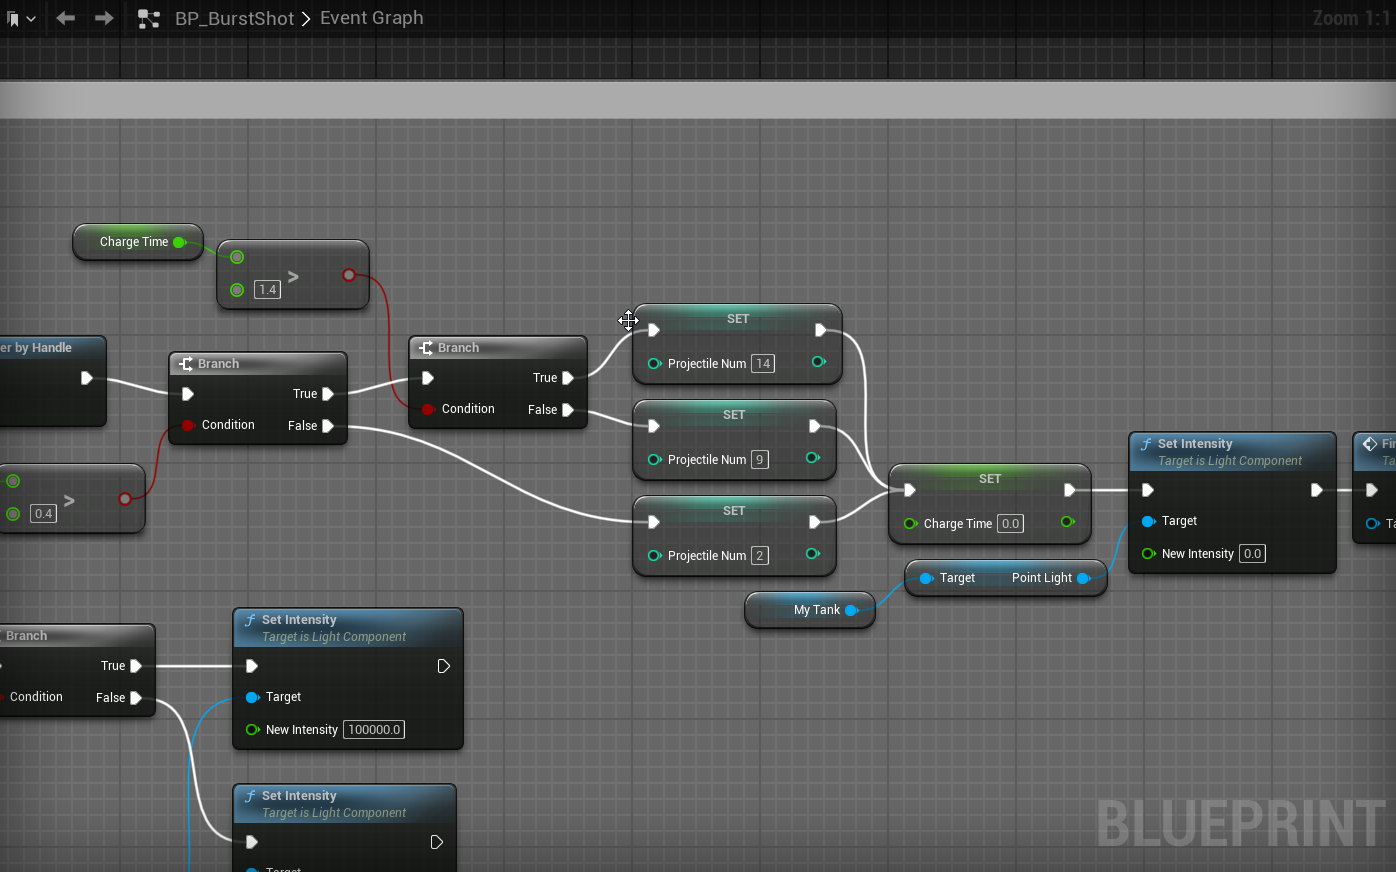
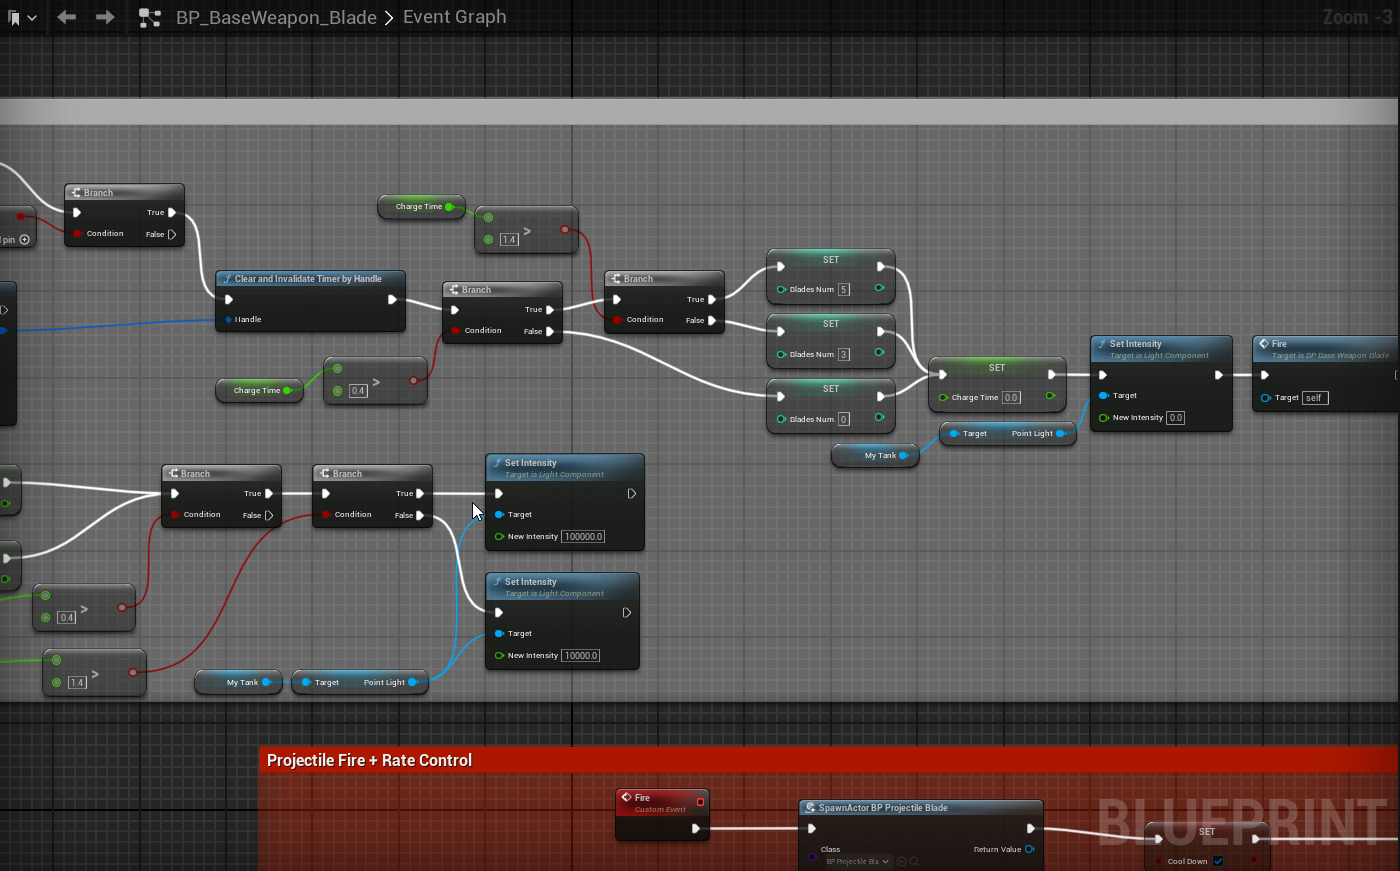
Next is the Blade weapon.
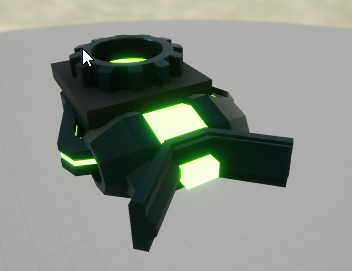
This weapon fires a blade that explodes into several blades when it hits something. It also uses the charge mechanic, so that the longer the charge, the more blades are shot out upon contact. (The video below shows an early version of the Blade Weapon.)
The blueprint below shows the Blade weapon's charging blocks.
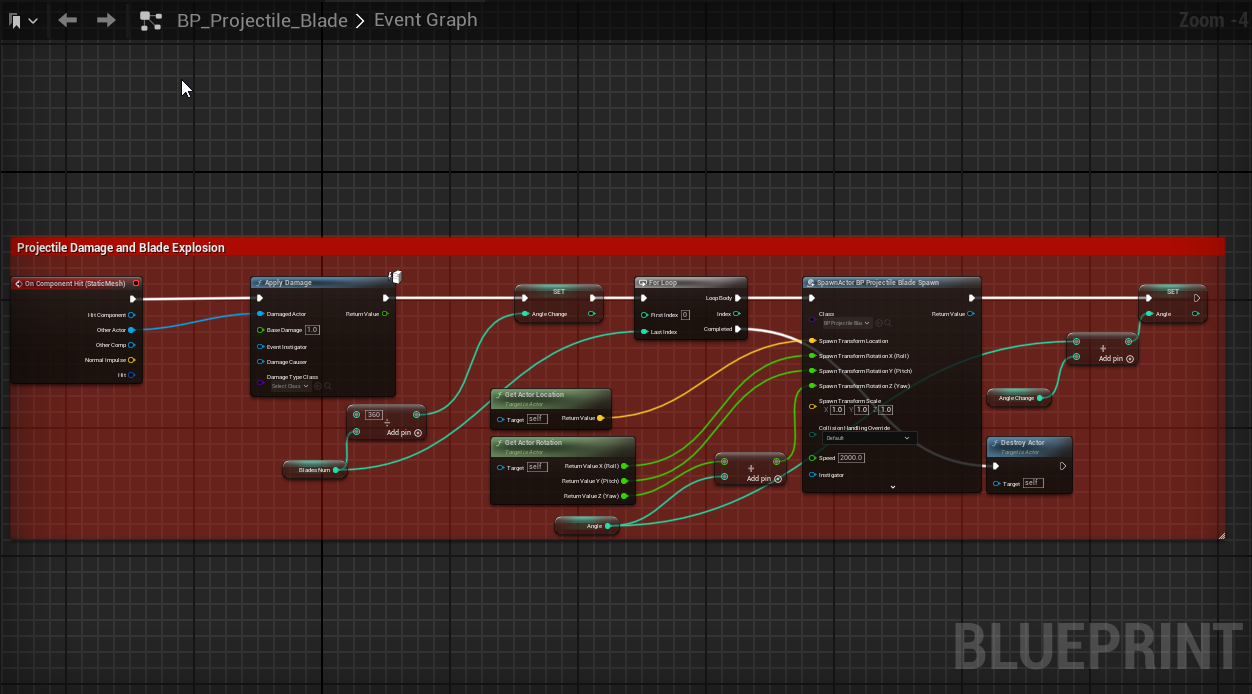
The blueprint below shows the Blade projectile blocks.
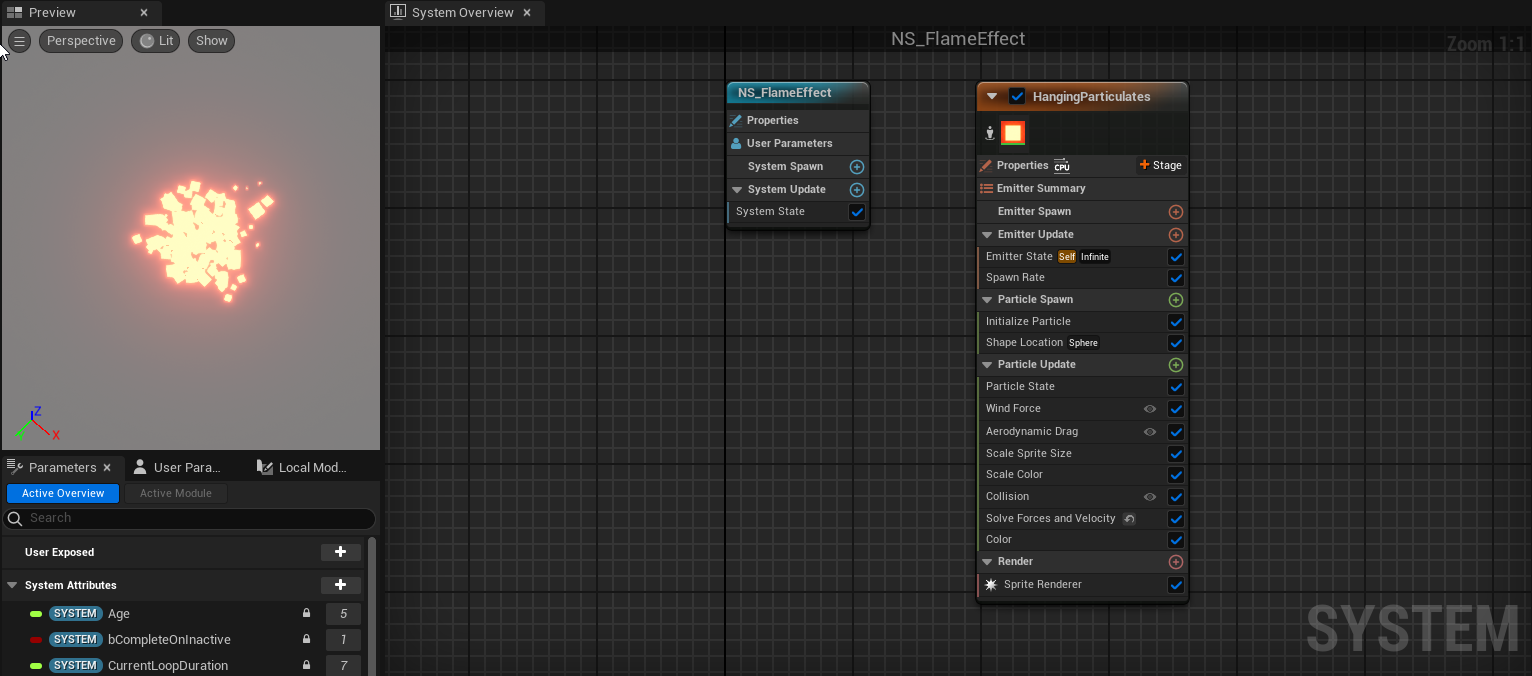
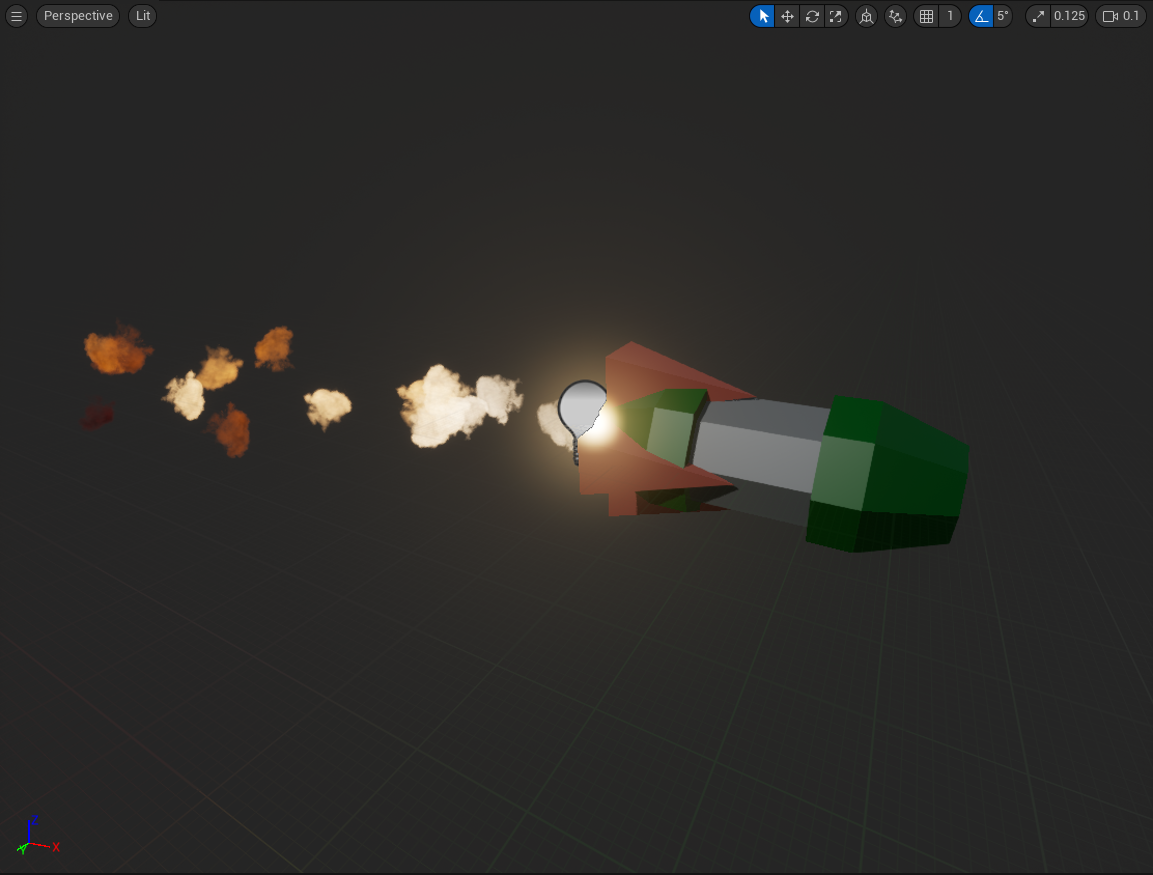
Next is the Flamethrower weapon.

This weapon fires slow moving projectiles in a constant stream to create a flame emitting effect. This is also the only other weapon with spread to its normal fire (the Shotgun being the first).
The blueprint below shows the Flamethrower effect blocks.
Next is the Electricity weapon.
This weapon fires projectiles that bounce to nearby enemies. It has a collider that detects enemies to bounce to and when hitting an enemy, it adds it to an array of hit enemies to ensure it cannot bounce between 2 enemies repeatedly.
The blueprint below shows the Electricity Projectile blocks.
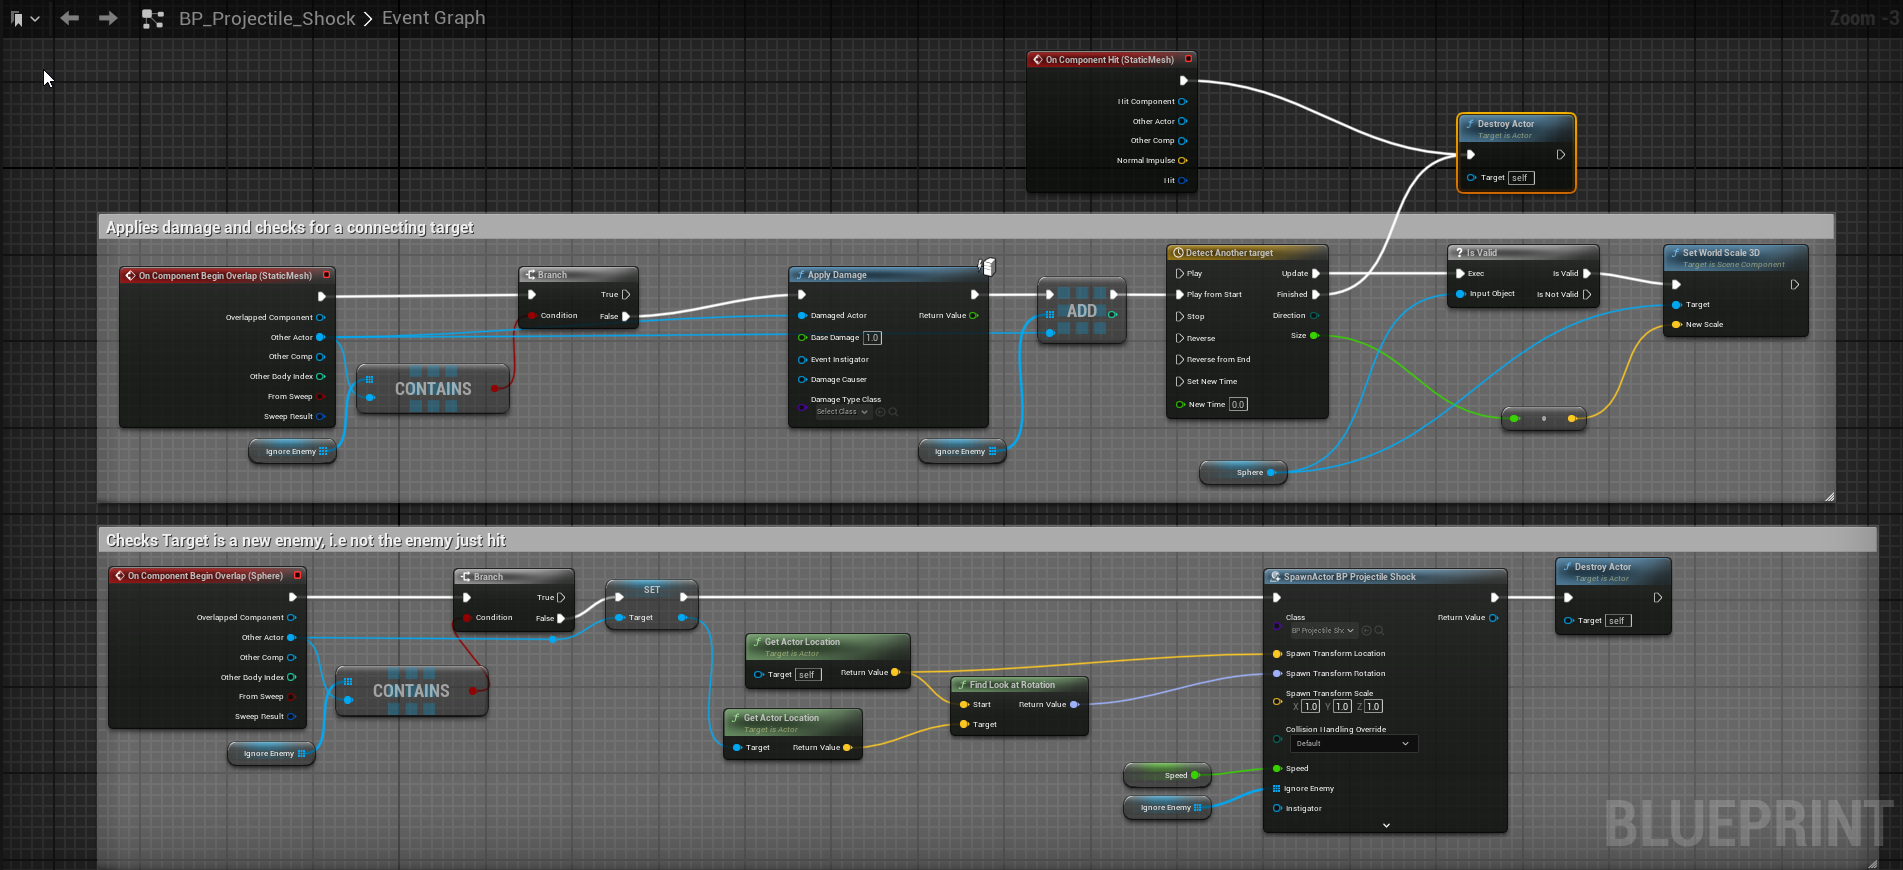
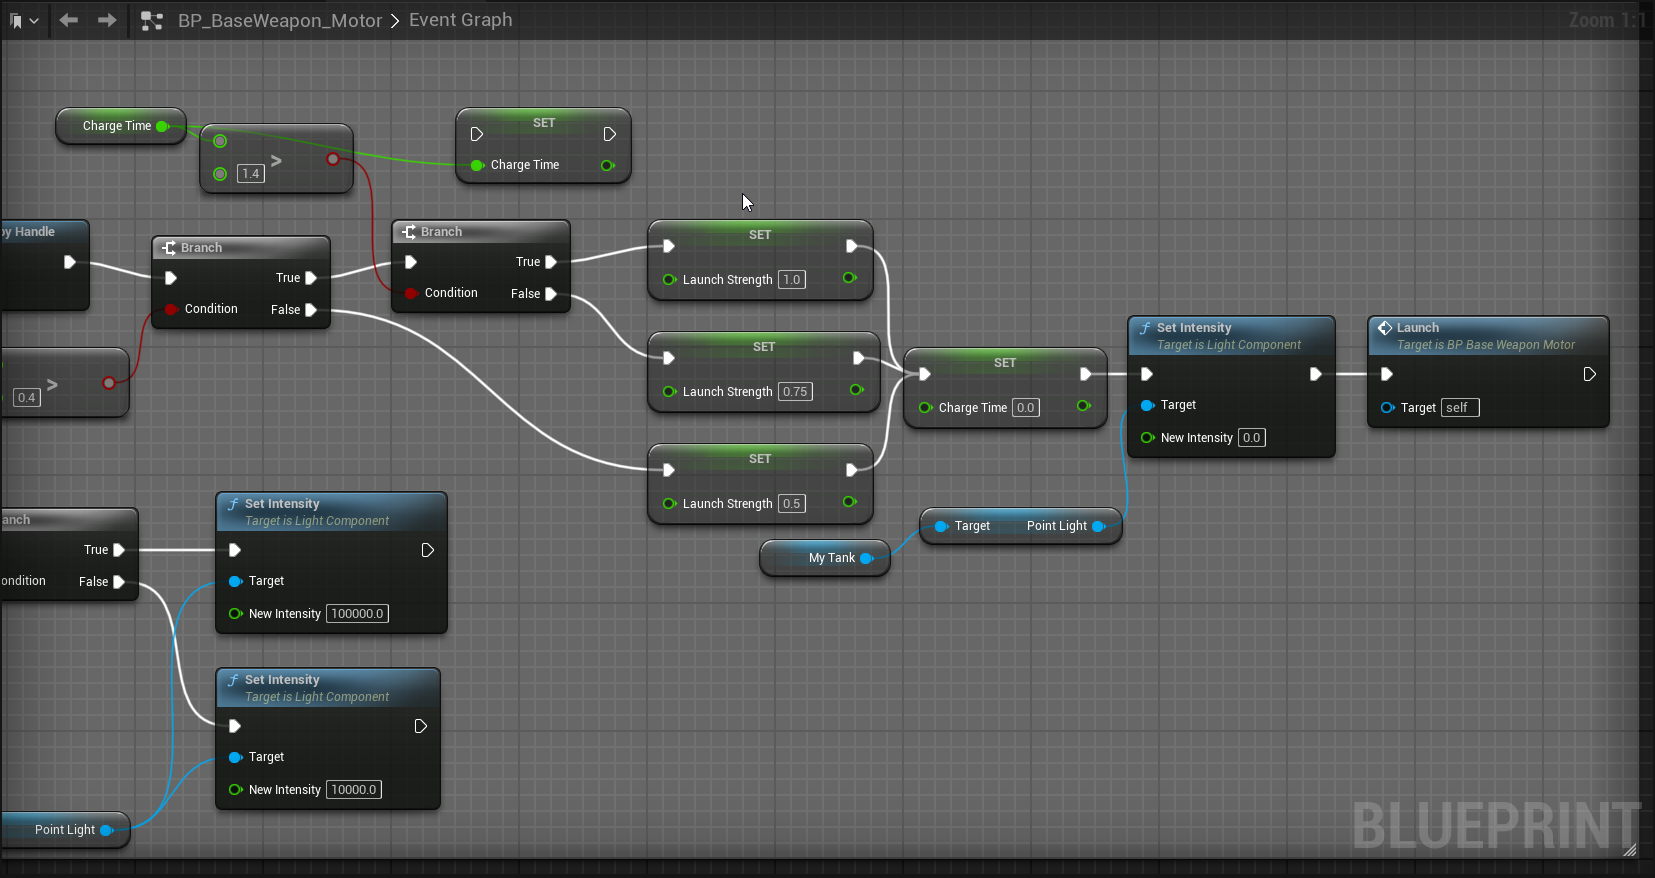
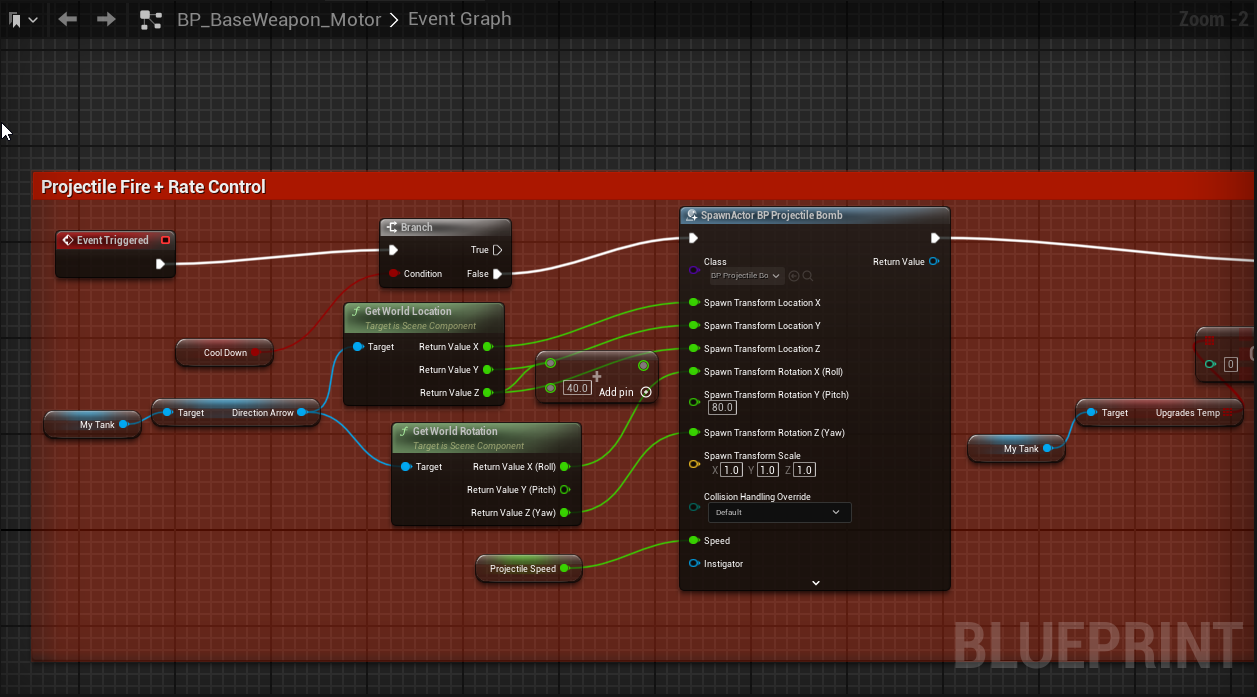
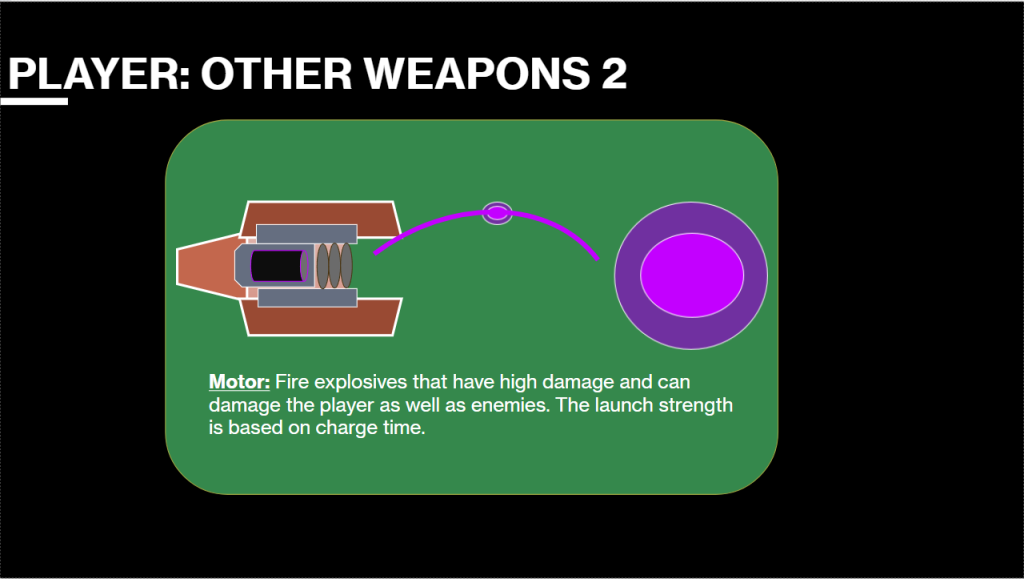
Lastly, we have the Motor weapon.
This weapon fires a projectile in an arc that then explodes on contact. It has a charge effect that increases range with charge time (to a maximum).
The blueprint below shows the Motor charge blocks.
The blueprint below shows the Motor weapon's blocks.
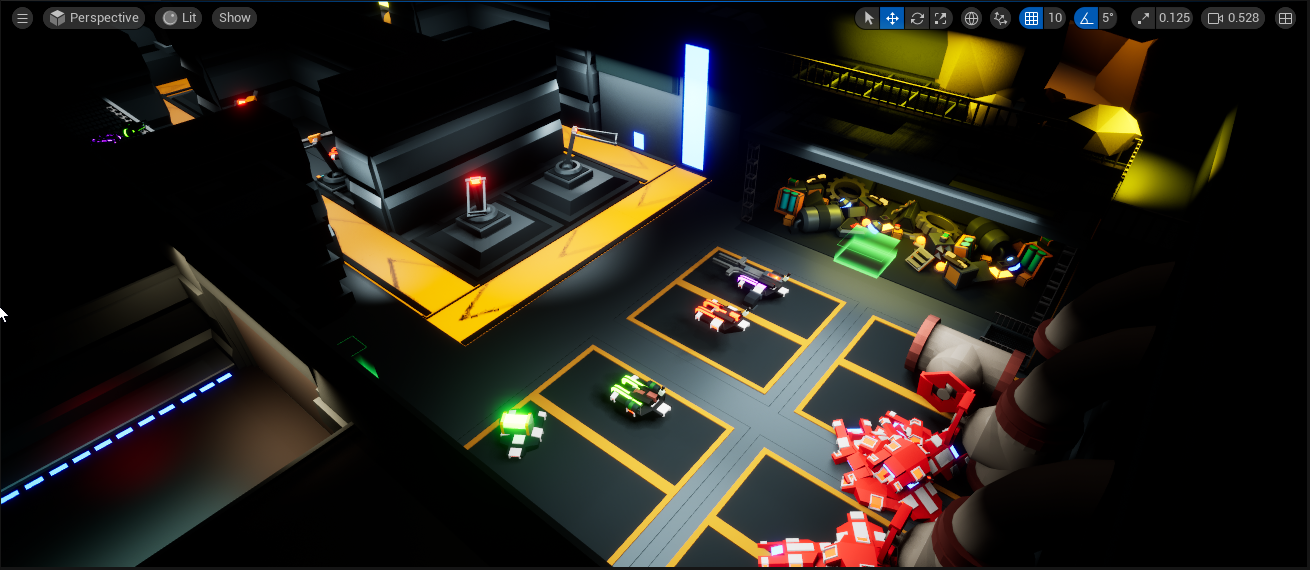
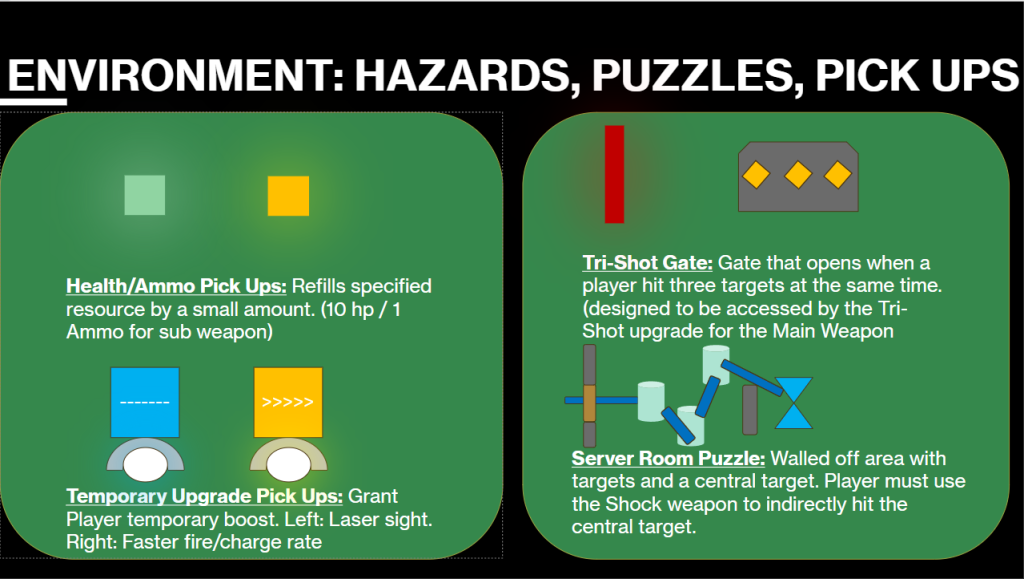
Power Ups & Pick Ups
The player can also find Power ups that boost their capabilities and Pick ups which grant health and ammunition for missiles (which will be covered soon).
Each power up has a limited time once accuired. There are two Power Ups in the game:
- Rapid Fire: Maximises fire rate/ charge speed.
- Lazer Sight: Creates a lazer sight on the players turrent.
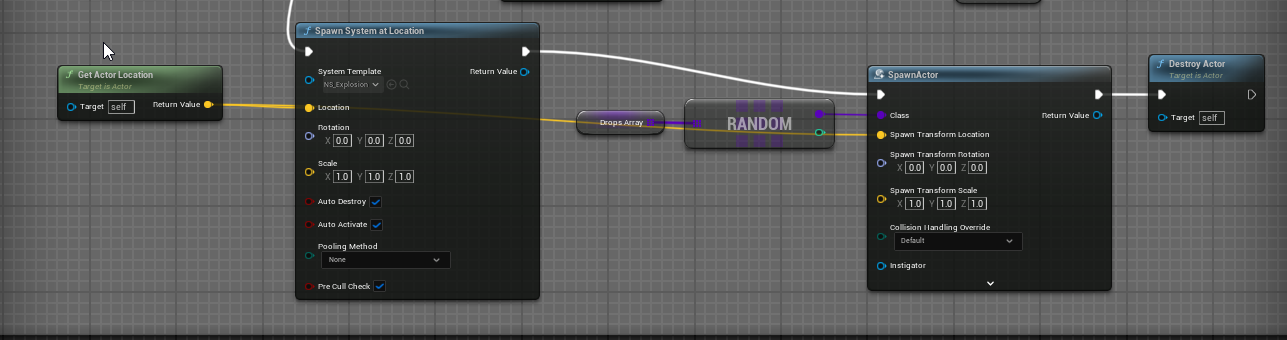
Both Power ups and Pick ups drop randomly from enemies.
The blueprint below shows the enemies random drops blocks.
Missiles
Lastly, the player can fire missiles by pressing right click. These missiles will travel, collide and then explode causing damage similarly to the Motor weapon.
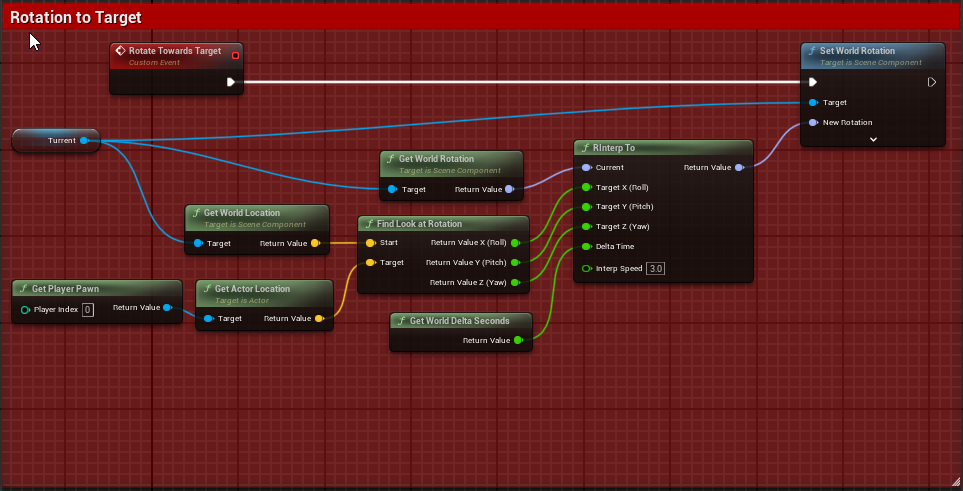
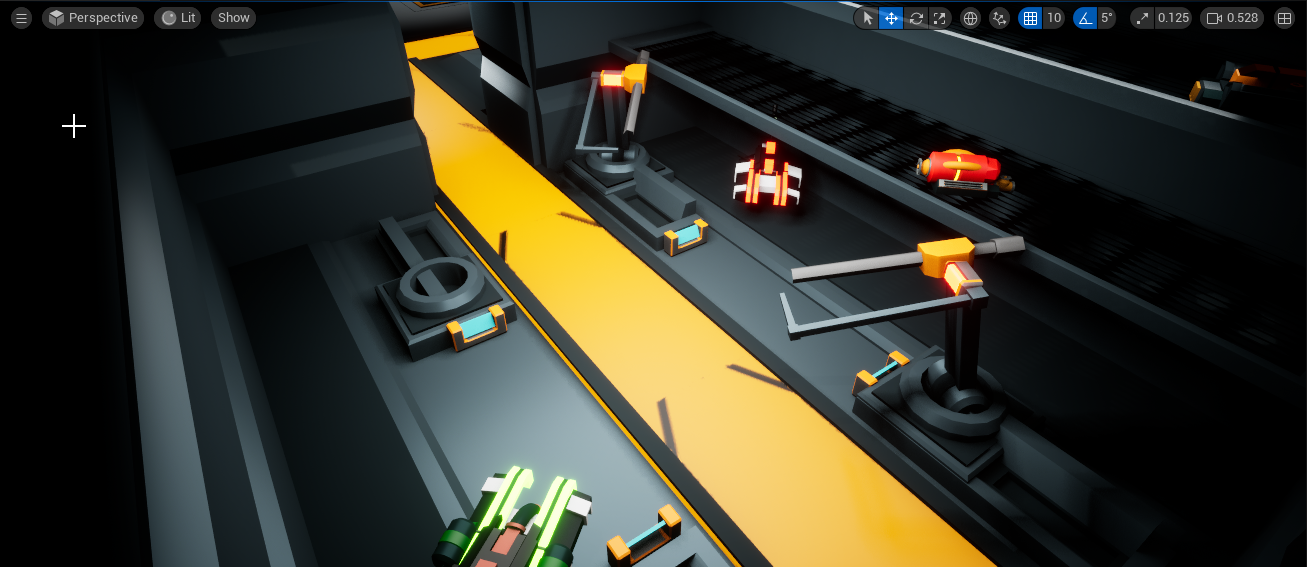
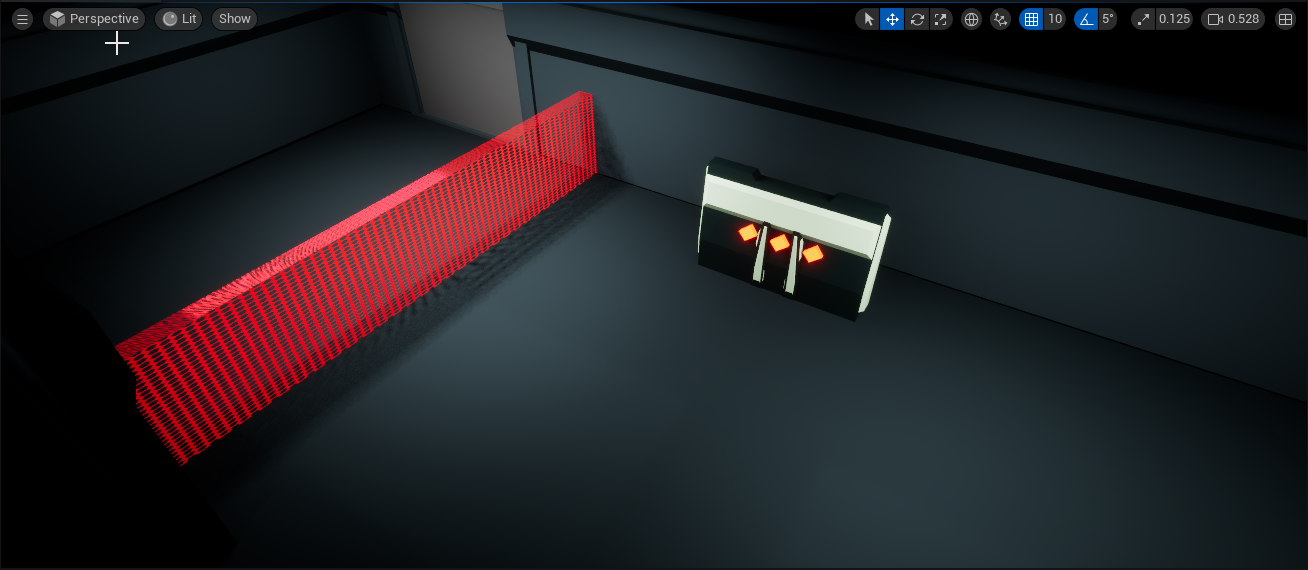
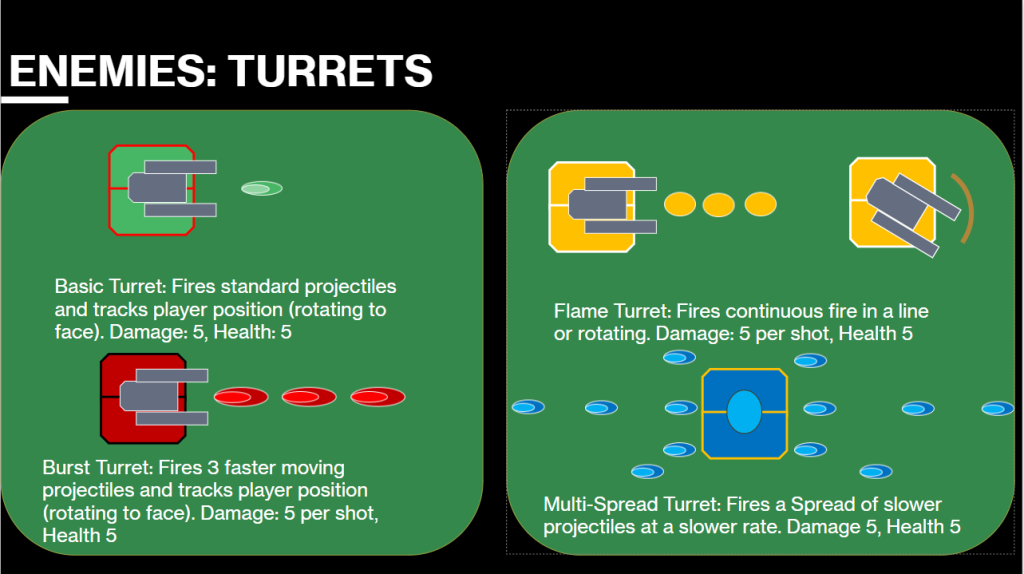
Enemies: Turrets
The first type of enemy is turret enemies. These enemies are always fixed in place and fire different kind of projectiles:
- Regular Shot
- Fast-Multi Shot
- Slow-Spread Shot
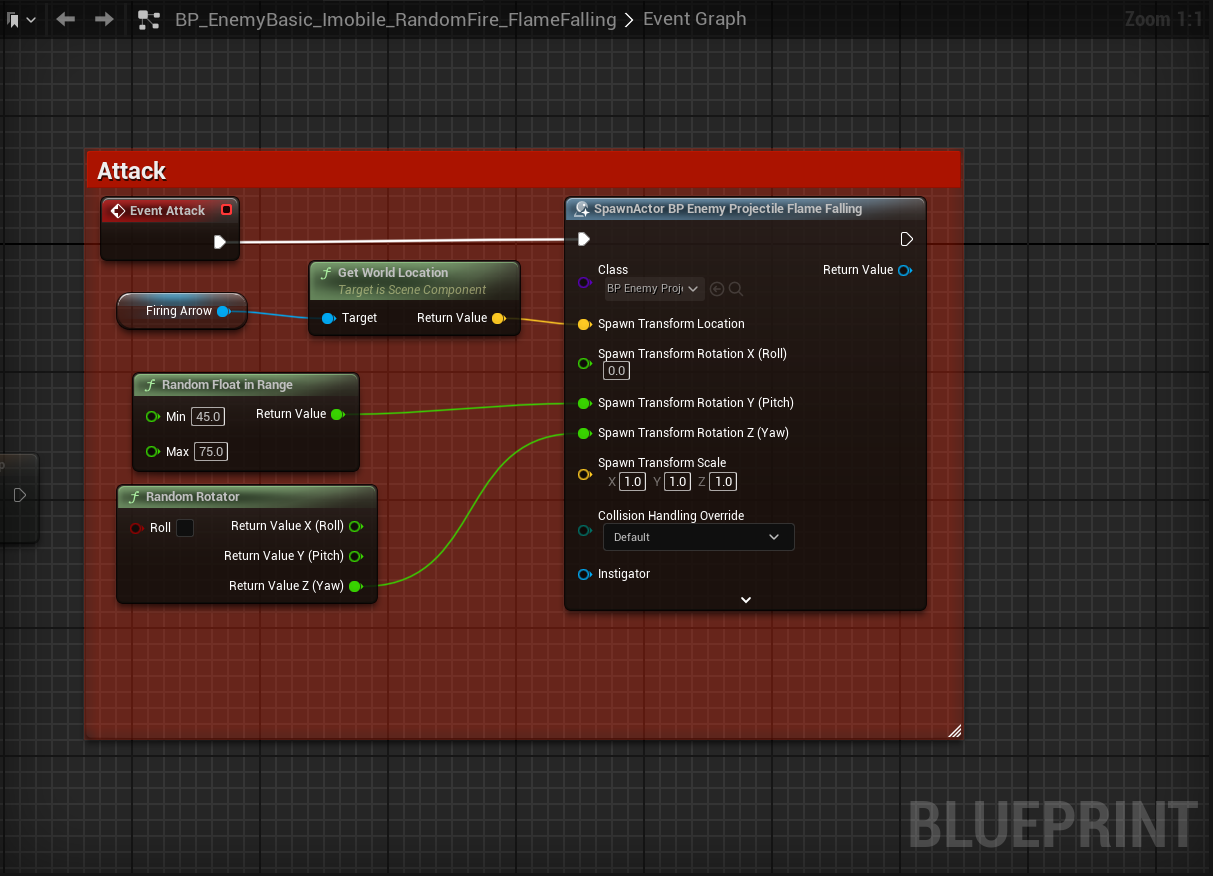
- Flame Shot (Slow-Continuous)
Some of these turrets can have special qualities like rotating constantly or being shielded.
The blueprint below shows the turret enemies rotation to player blocks.
The blueprint below shows the flame turret enemies constant rotation blocks.

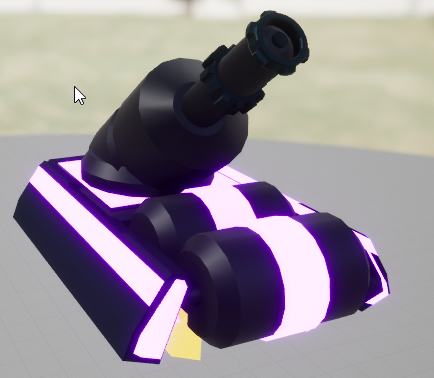
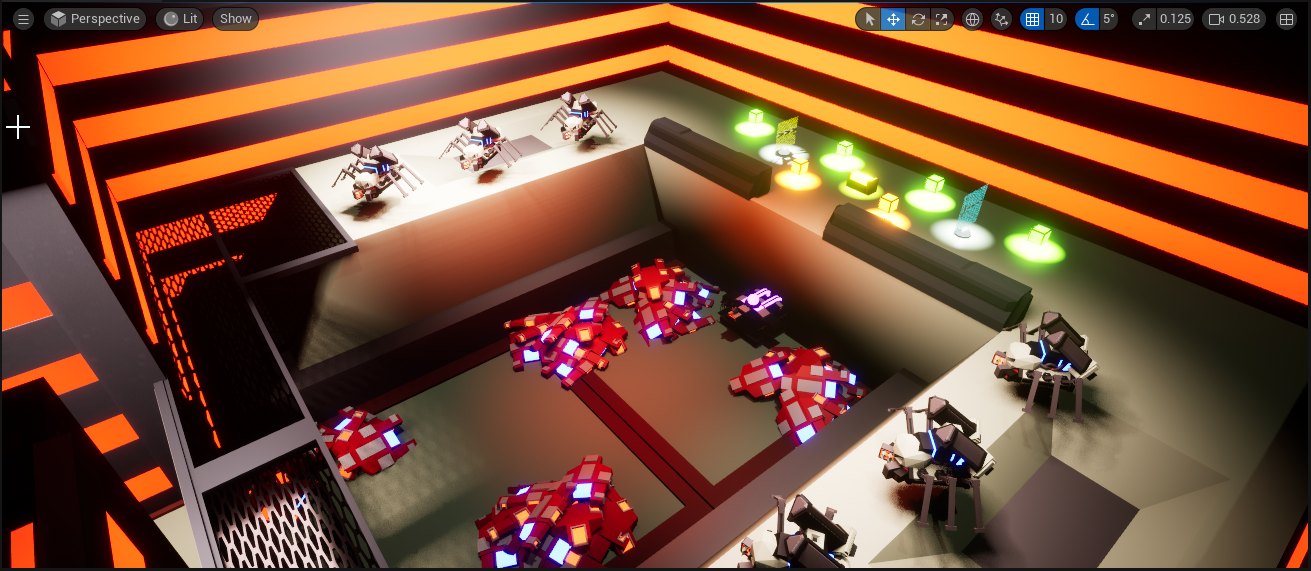
Enemies: Tank
The next type of enemy is Tank enemies. These enemies can be mobile, have more health than turrets and have a greater variety of attacks:
- Acid tanks drop Pools of Acid on the ground that harm the player.
- Heavy tanks are fixed in place and fire powerful projectiles that do high damage.
- Regular tanks follow the player and shoot directly infront of them.
- Spread tanks are fixed and fire multiple projectiles in different directions.
The spread tank has a veriance where it fires flame projectiles upwards that fall down on their enemy.
The blueprint below shows the Tank projectile fire blocks.
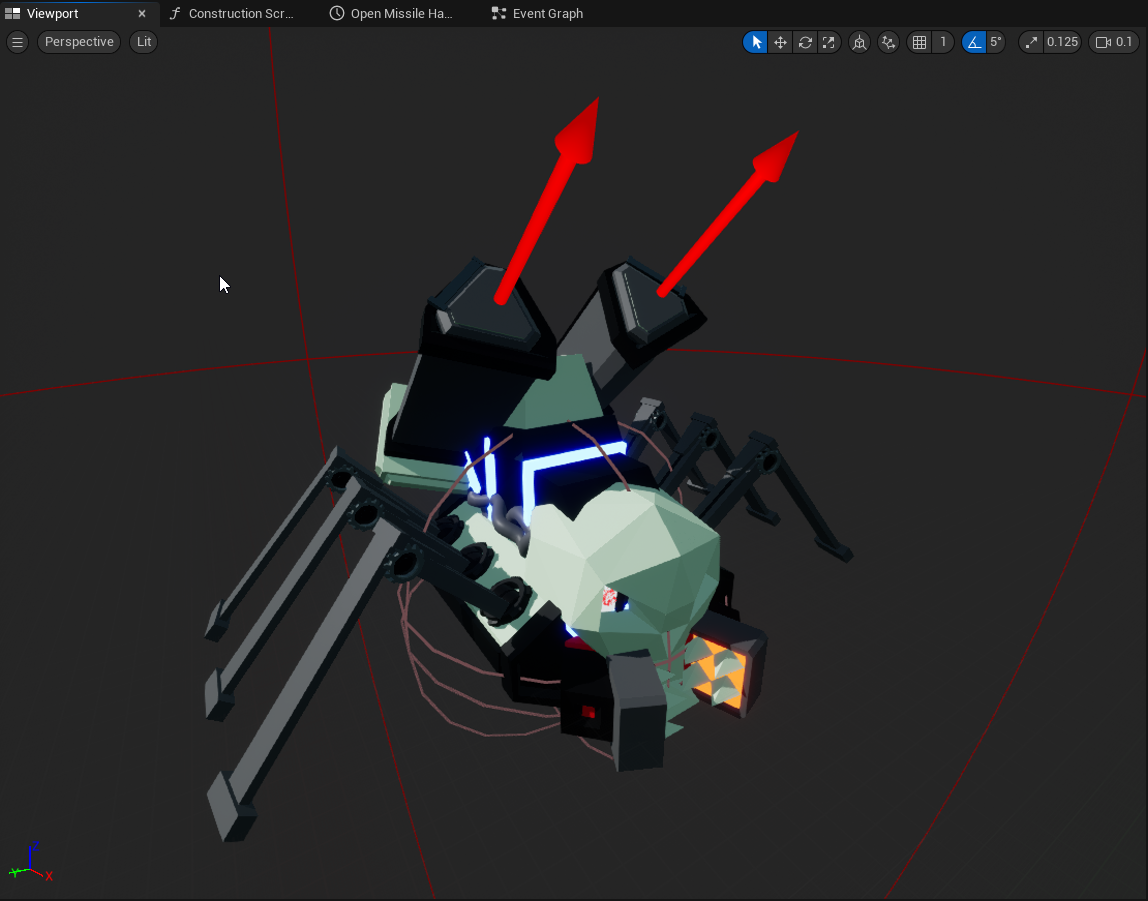
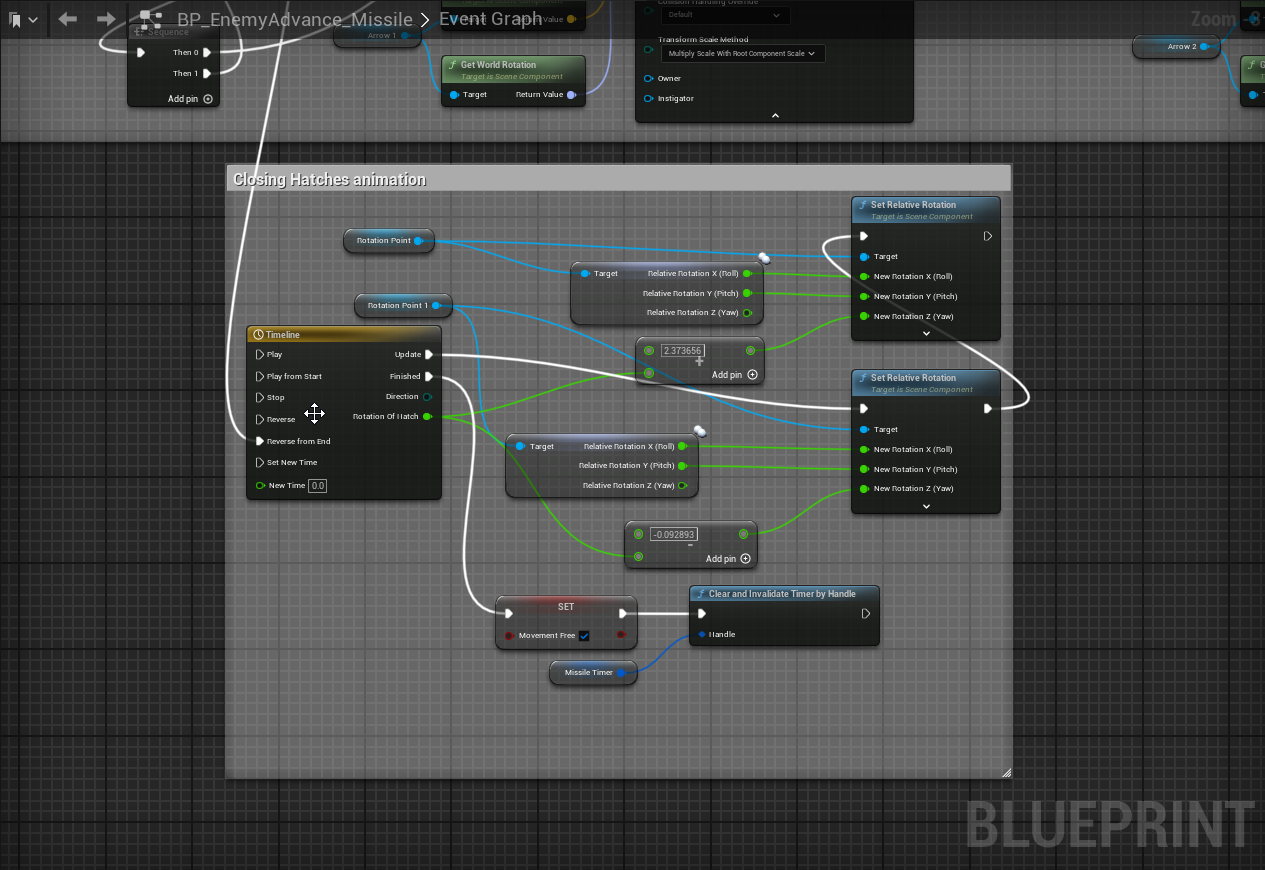
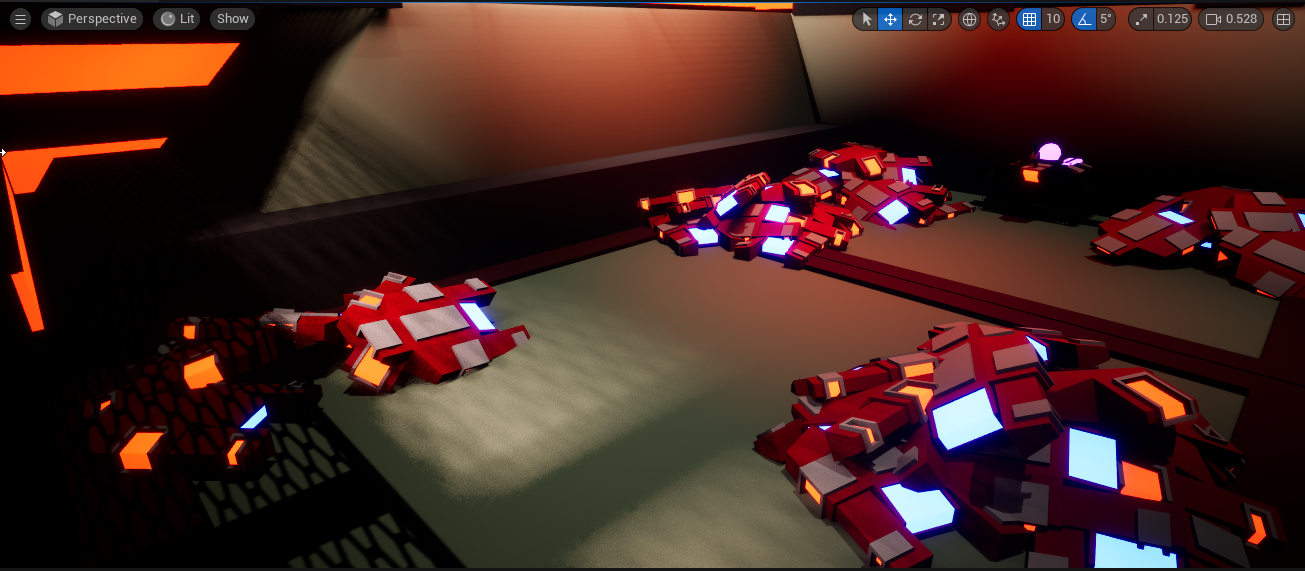
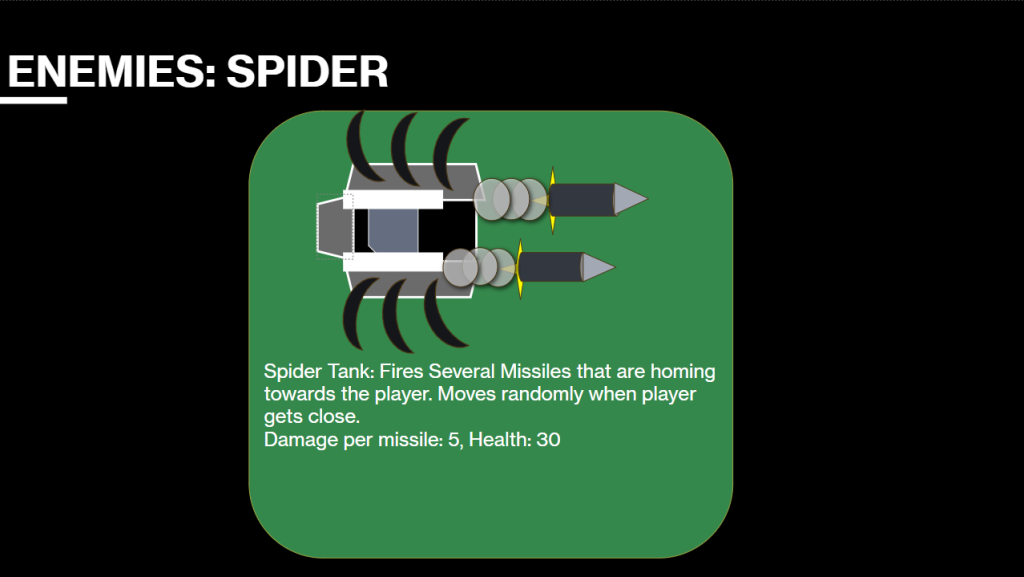
Enemies: Spider
This enemy serves as the boss of the level and works by firing several rocket projectiles in quick sucsession with long delays. Their design is alien compared to the other enemies, showing a glipse into the greater world of the game.
The blueprint below shows the Spider enemy missile hatch animation blocks.
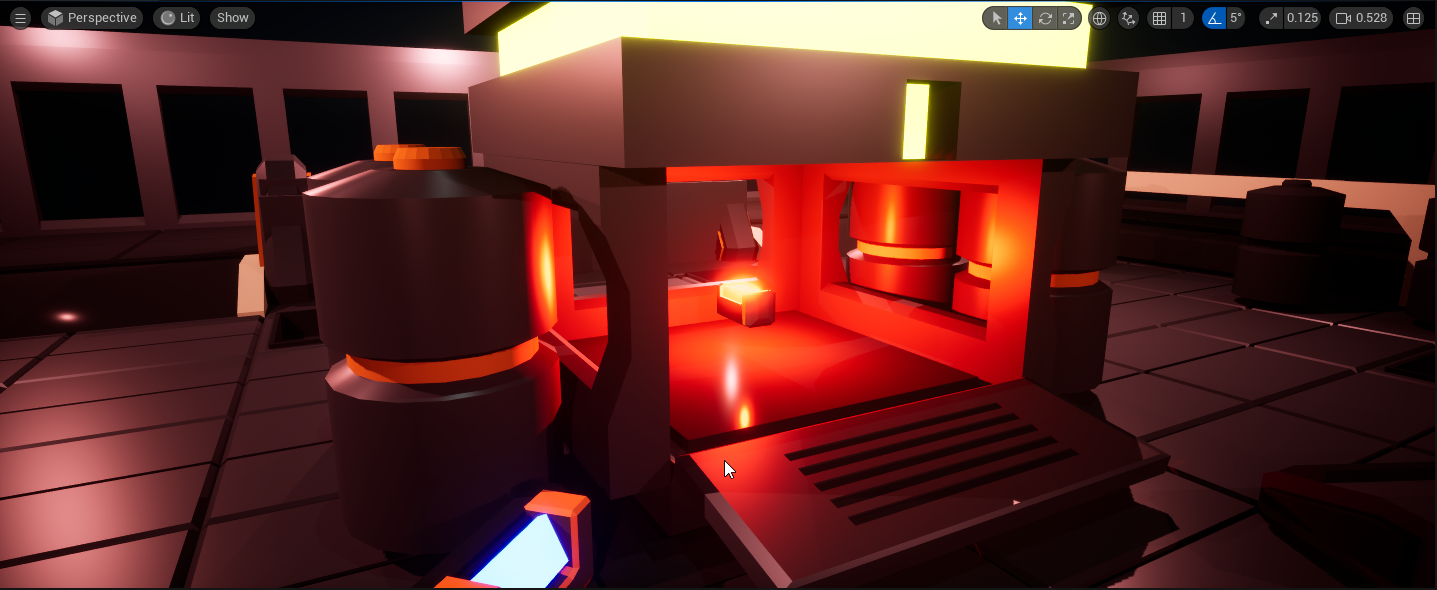
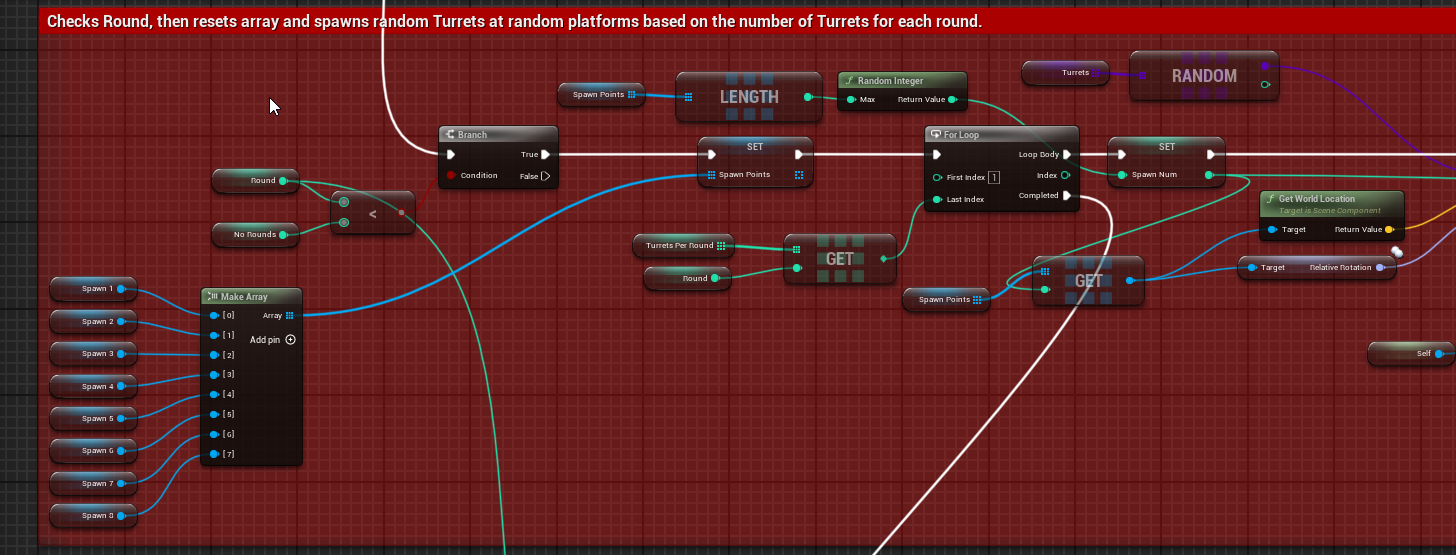
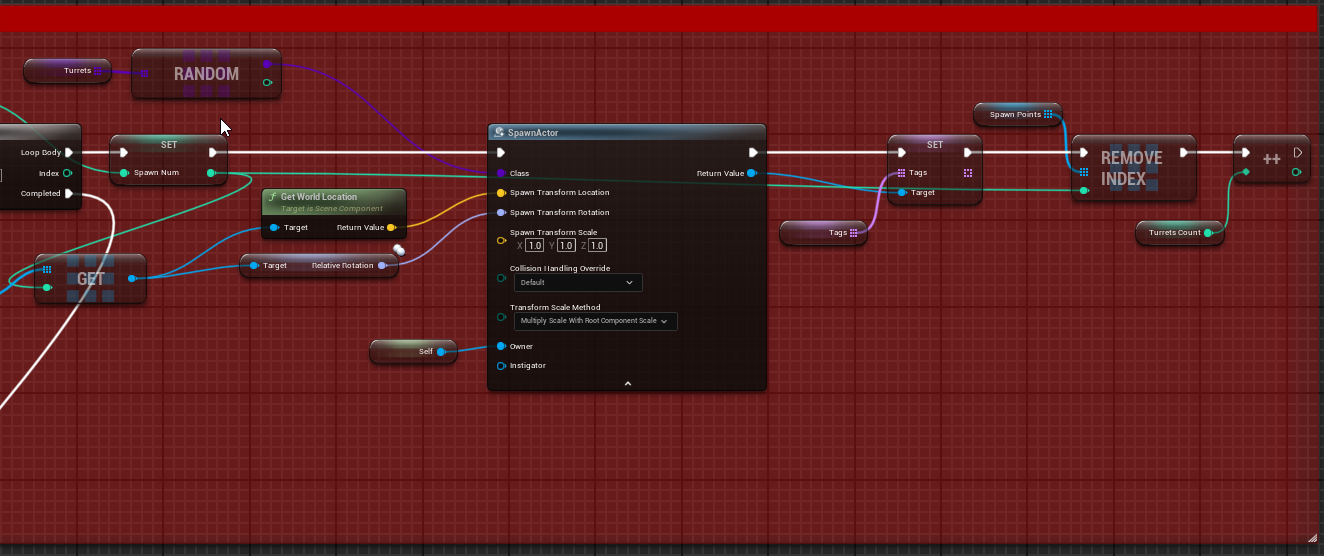
Mini Boss Enemy
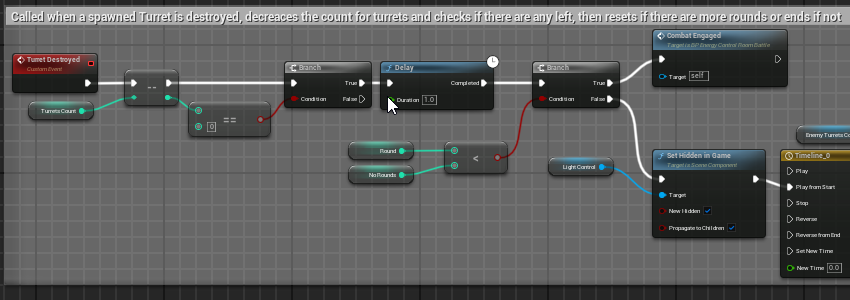
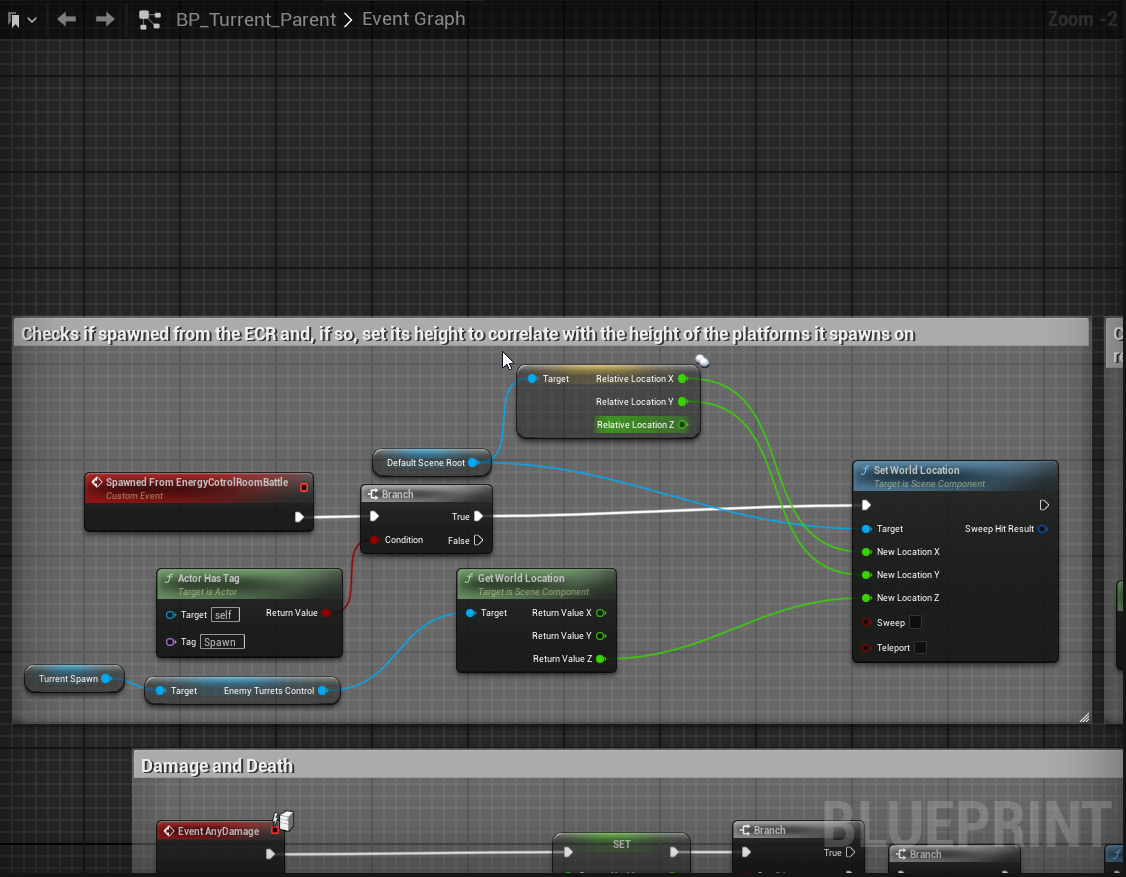
During an earlier section of the level, the player encounters a mini boss which works by spawning turrets randomly on several platforms with each wave of turrets being greater than the last. To visually show this, the turrets are lowered below view, spawned and then raised up, with a grate sliding over the hole they come from to stop the player falling in.
The blueprint below shows the blocks for spawning turrets.
The blueprint below shows the blocks for counting down remaining turrets.
The blueprint below shows the blocks for setting the hight of a turret to allign.
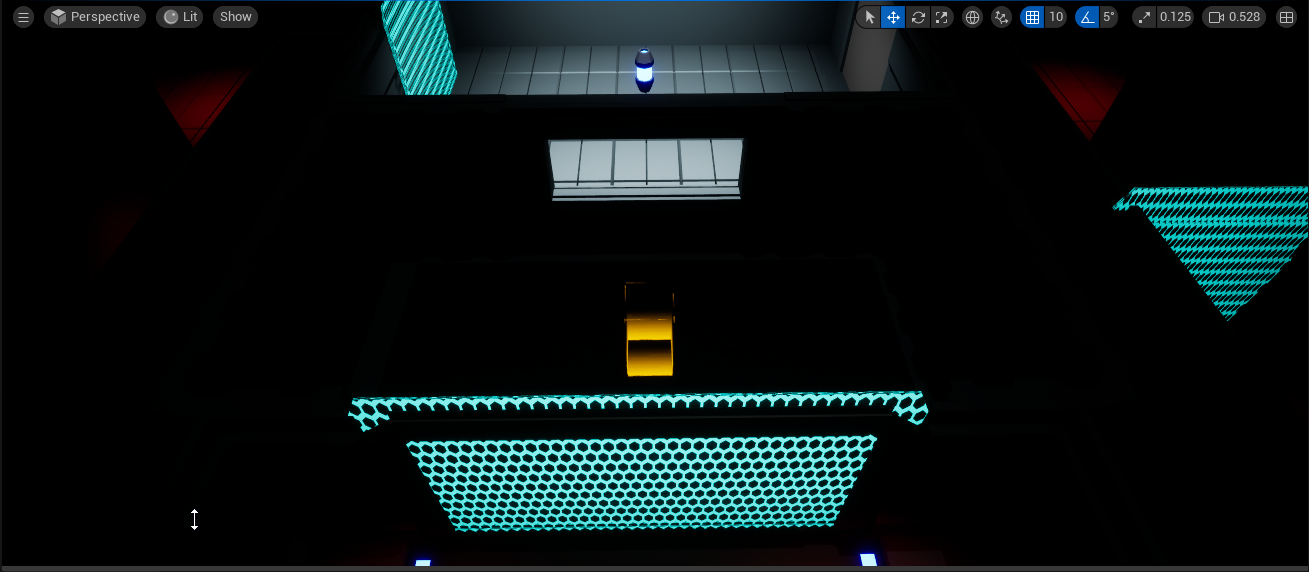
Enviromental Elements
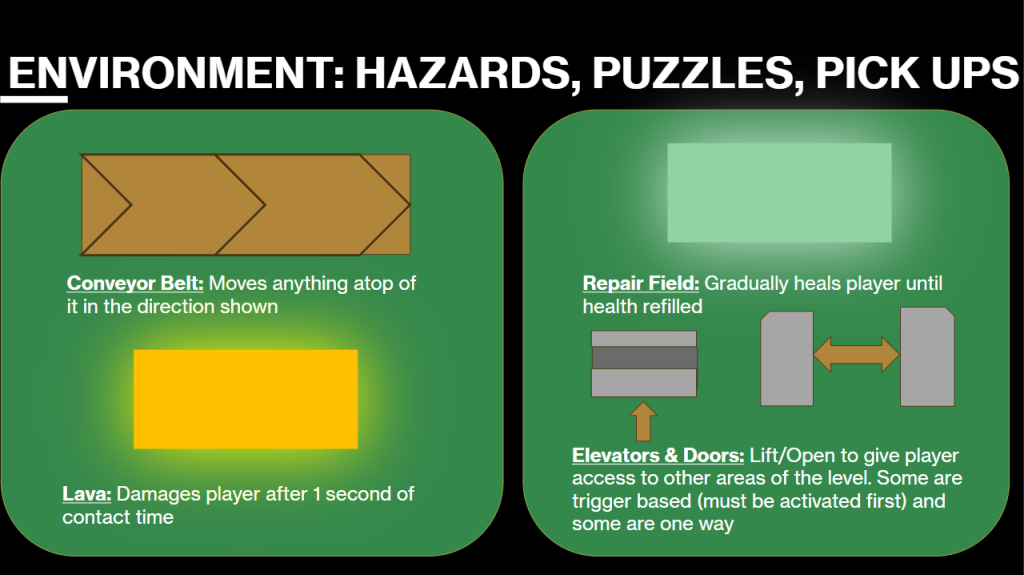
The level feature many enviromental elements which interact with the player and enemies. The simplist of these include:
- Healing areas
- Lava areas (which cause damage over time).
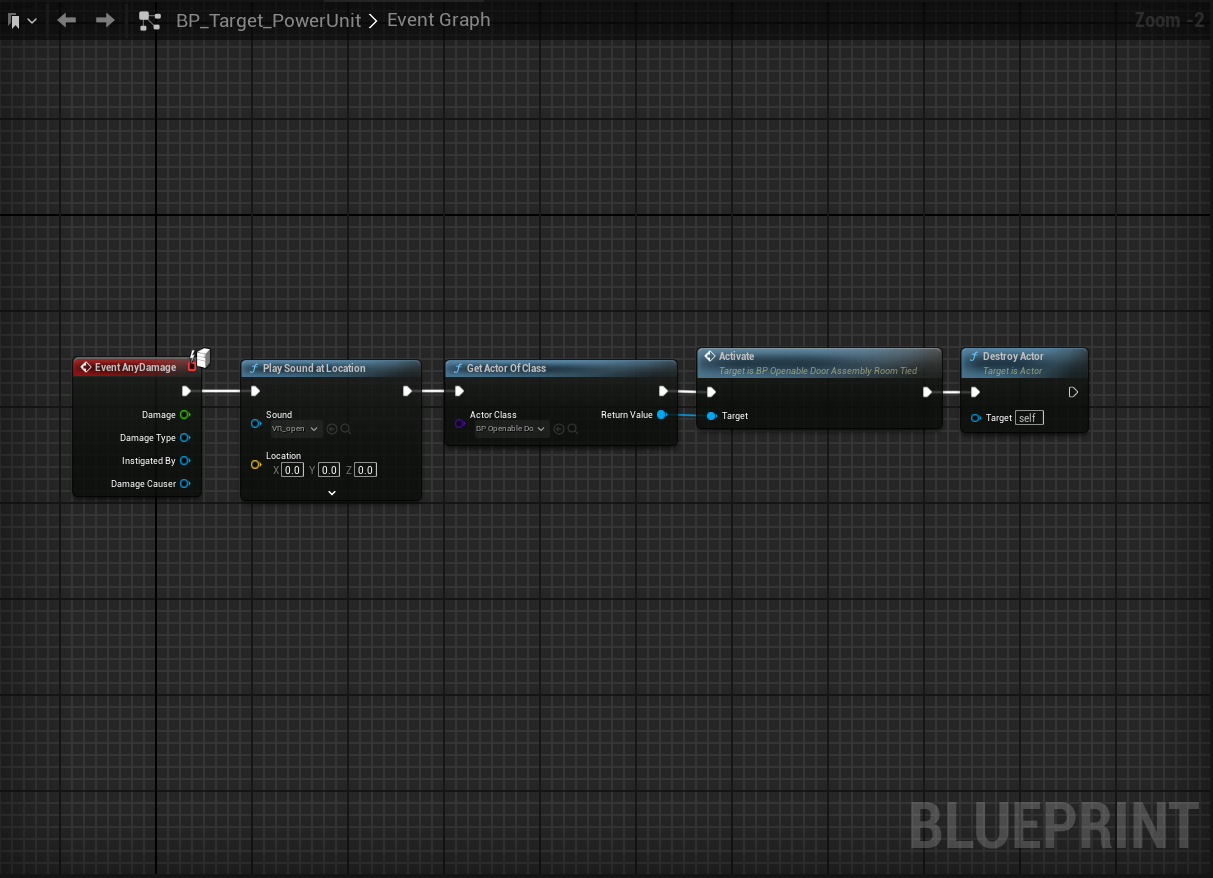
- Doors which activate when the player enters a collider around them.
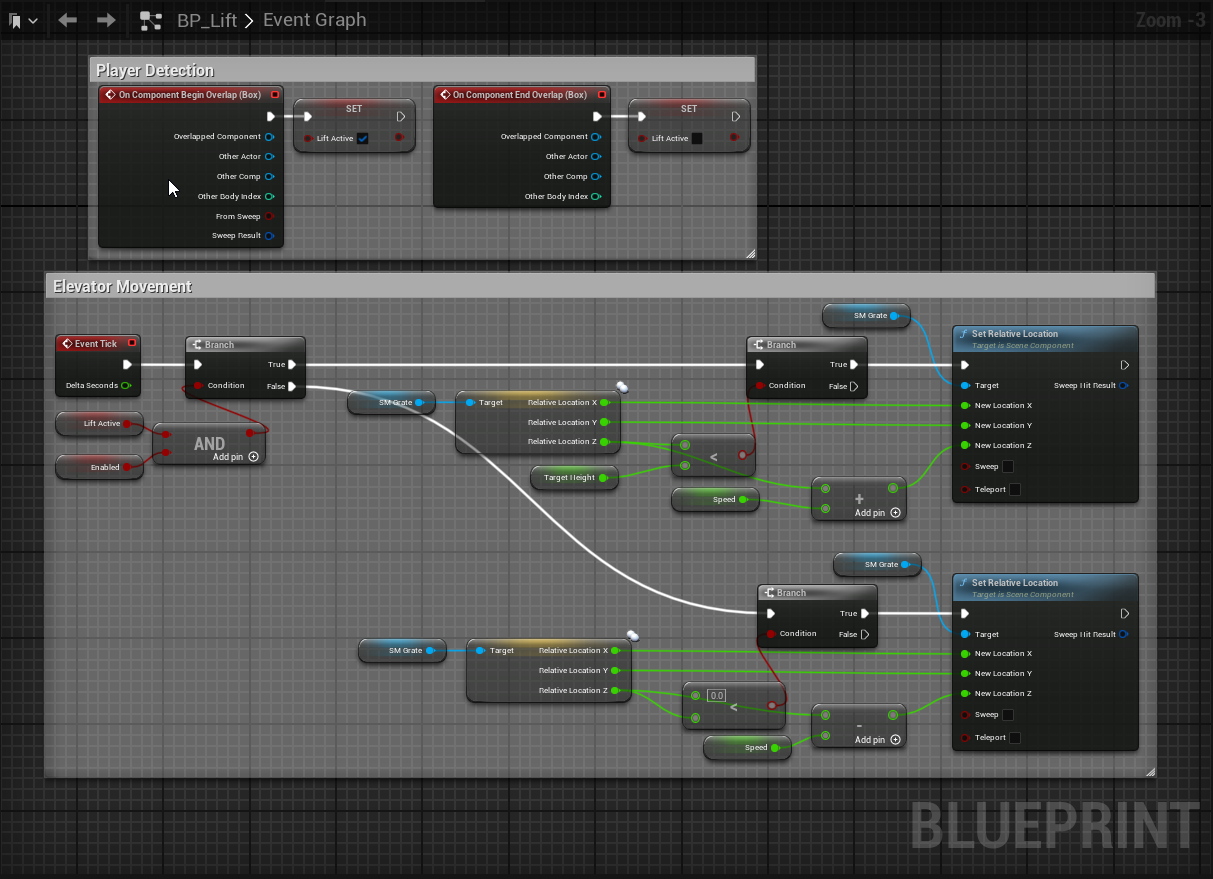
- Elevators which move when the player enters a collider above them.
- Explosive barrels which explode upon any damage and will damage all in its explosion radius.
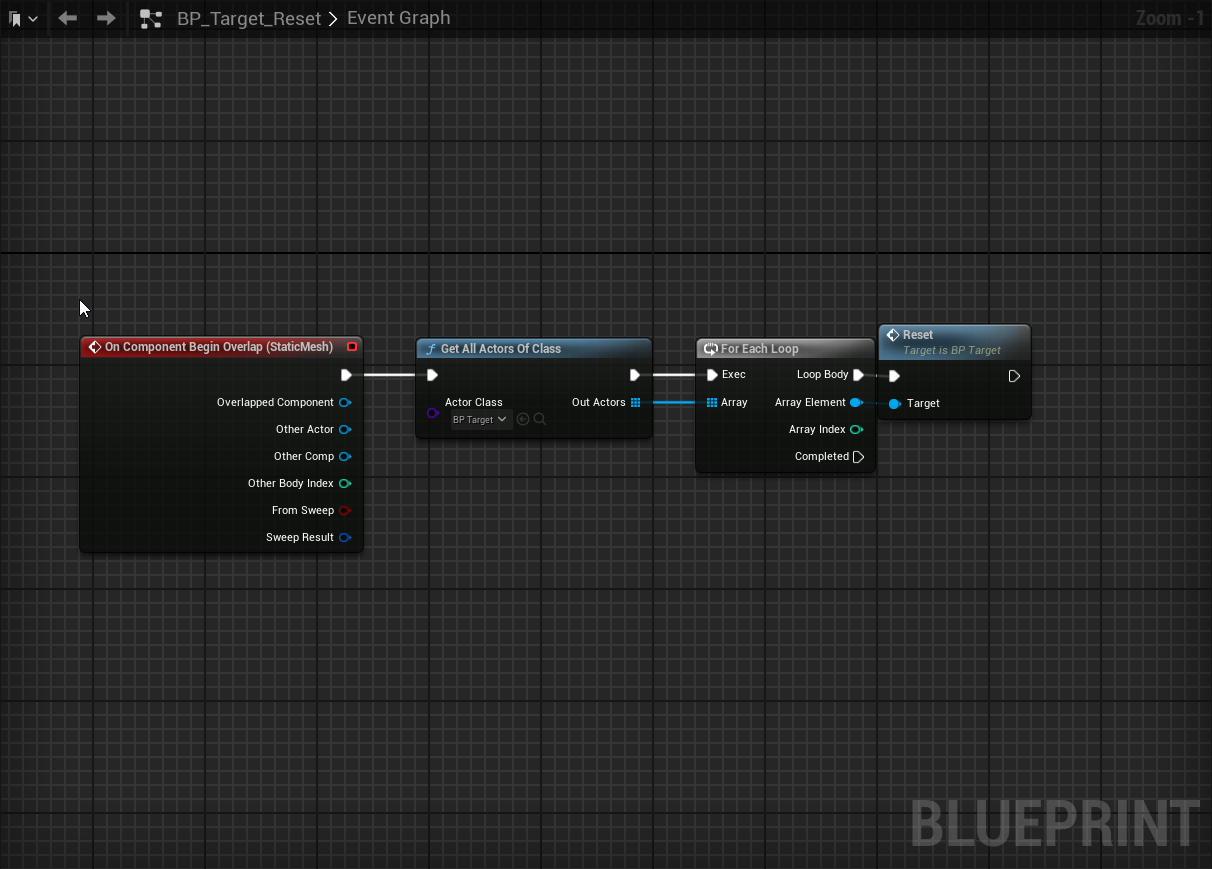
- Targets that disappear upon damage.
- Shields that block player projectiles.
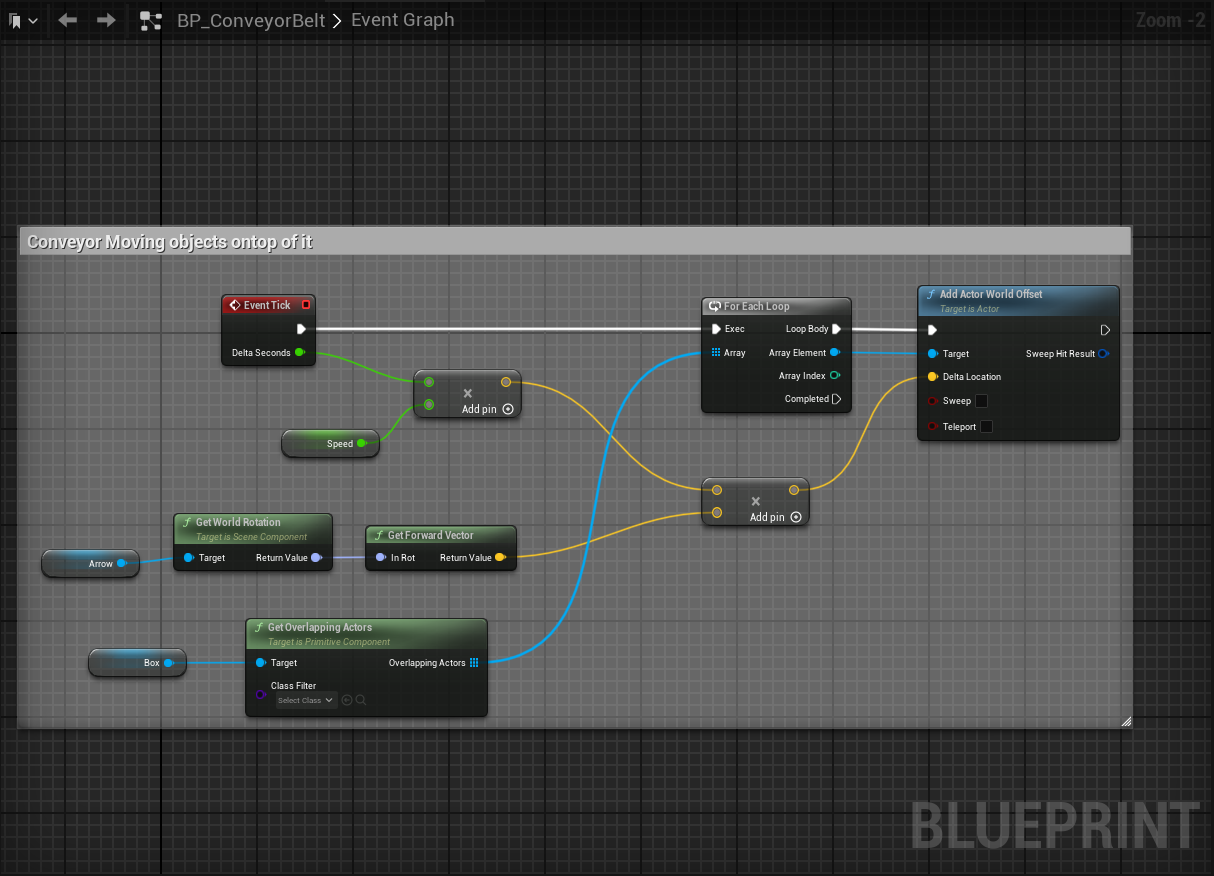
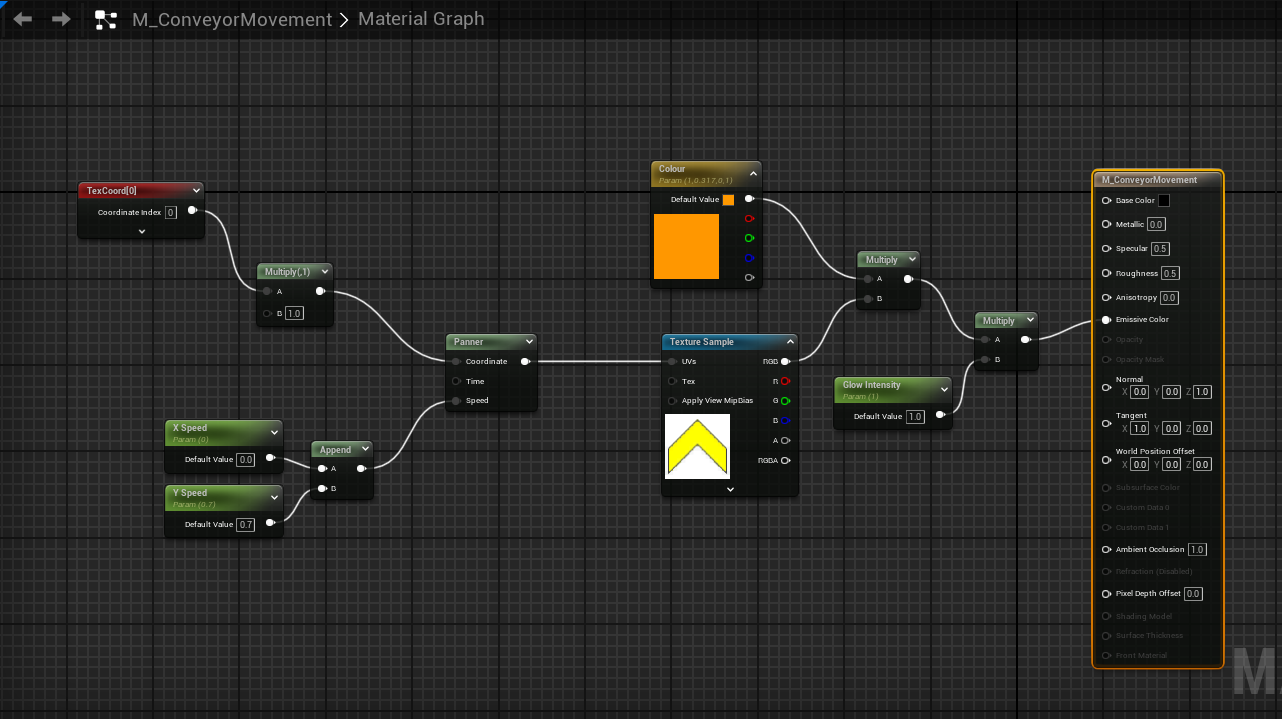
- Conveyor belts that move both player and enemies in a given direction.
The blueprint below shows the blocks for Elevator functionallity.
The blueprint below shows the blocks for targets and target reset.
The blueprint below shows the blocks for Conveyor Movement and Animation.
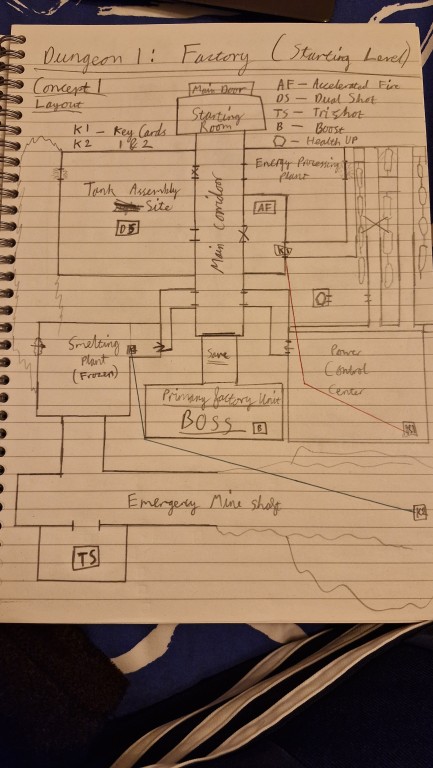
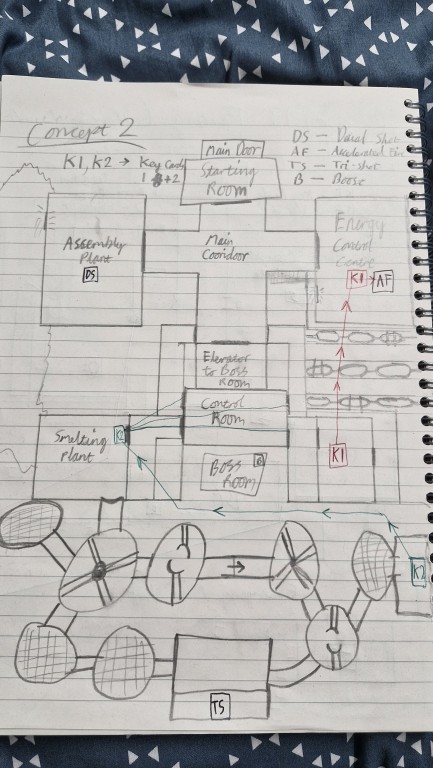
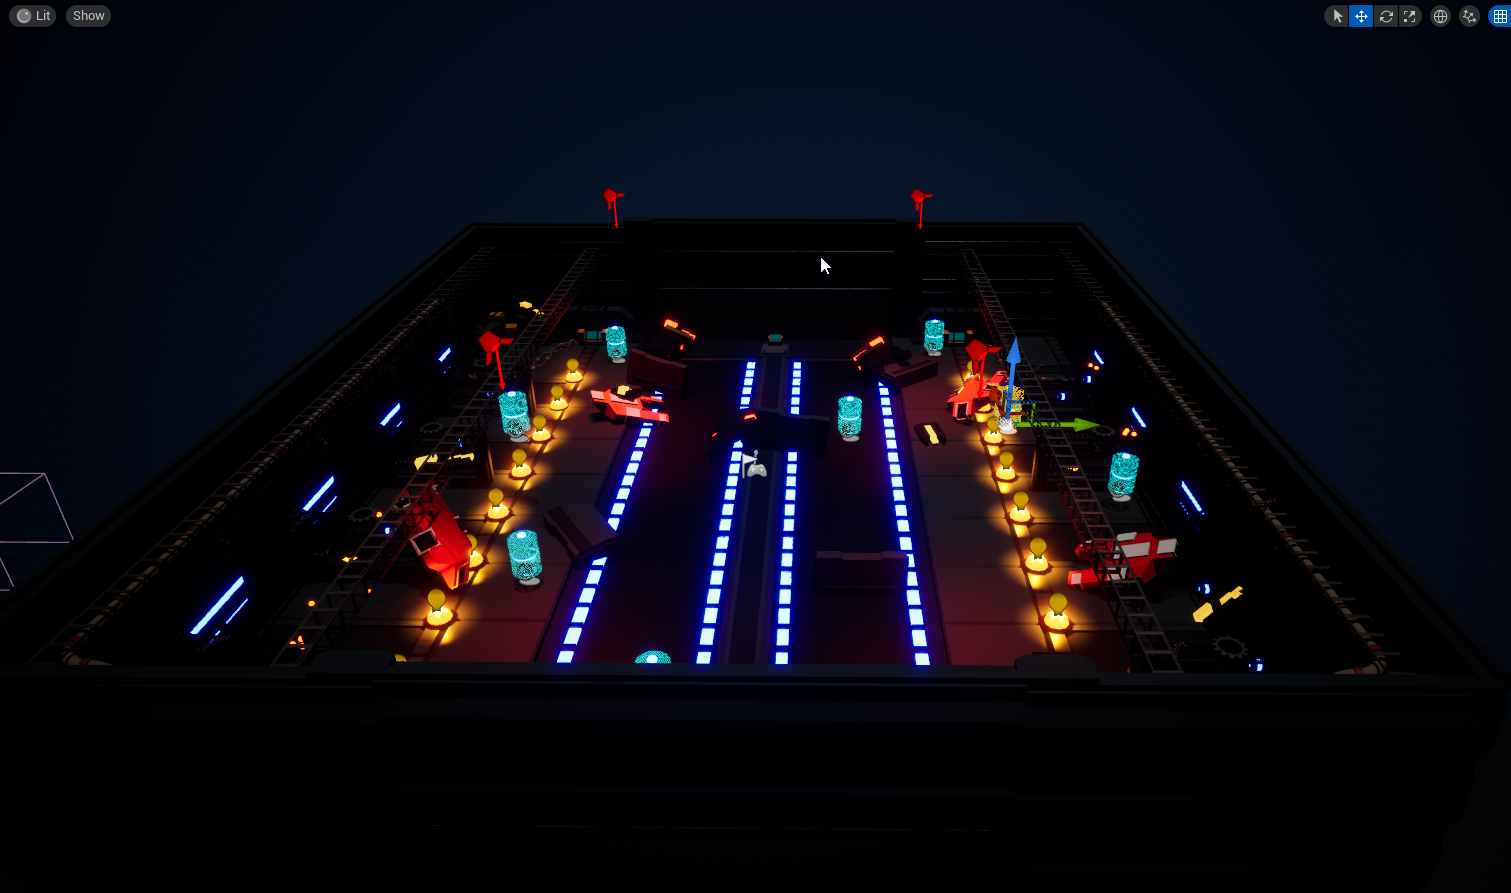
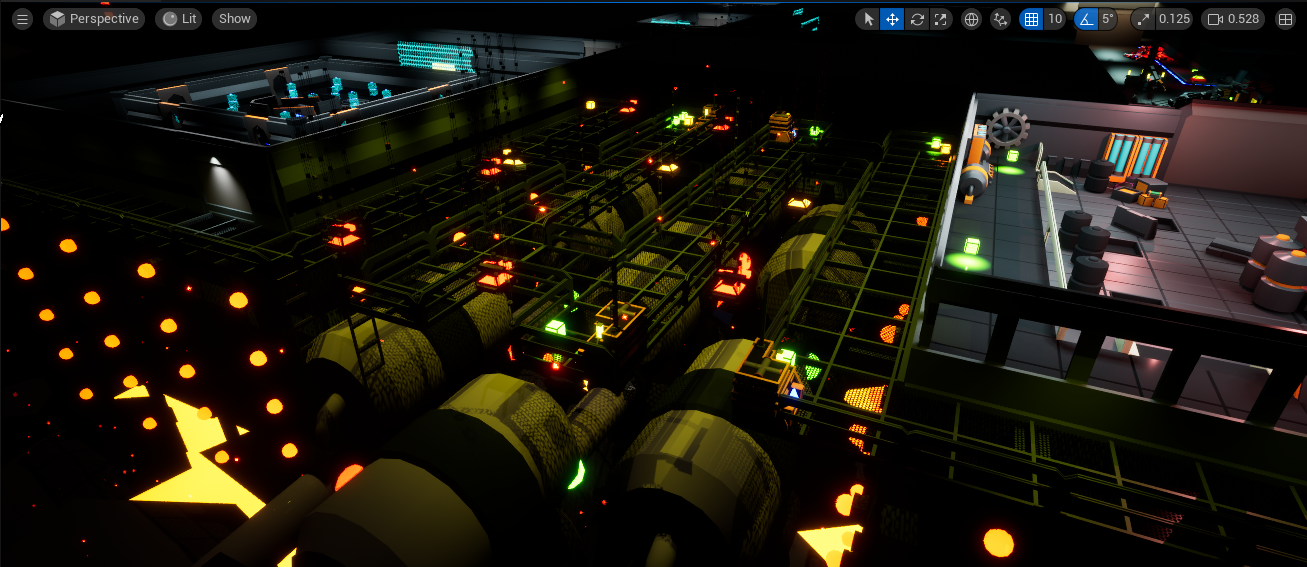
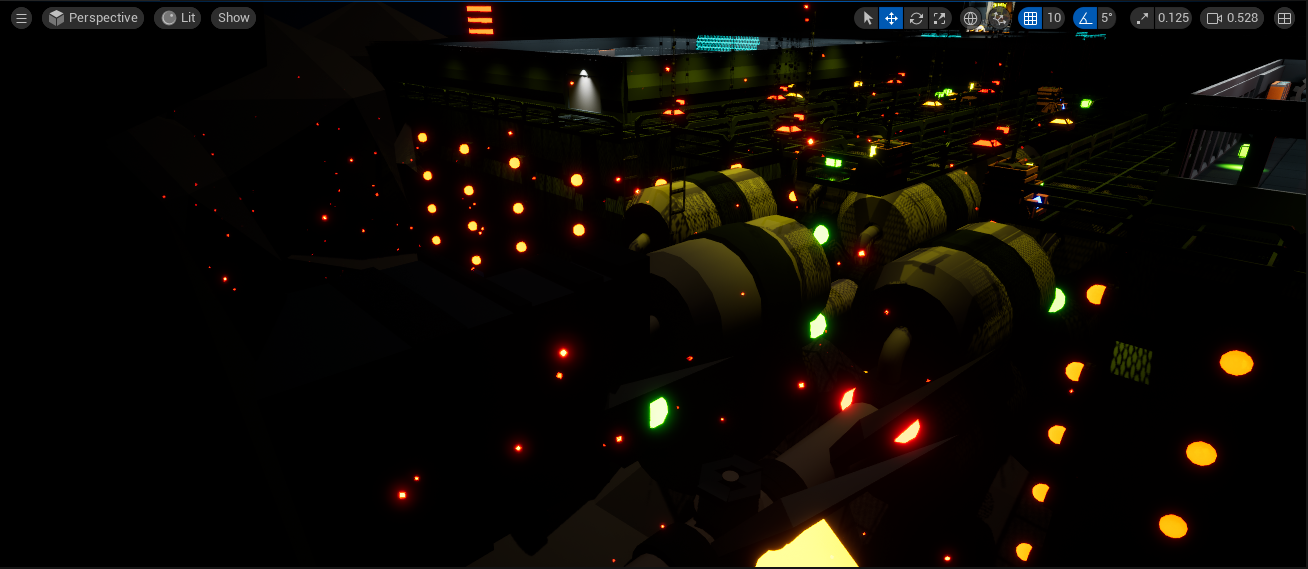
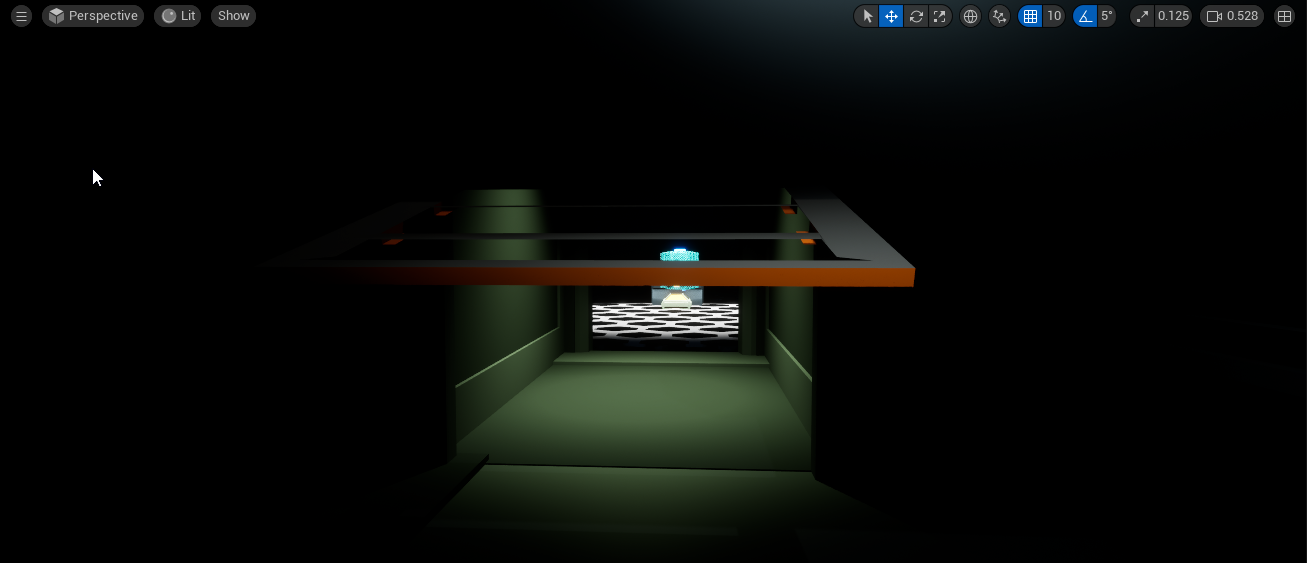
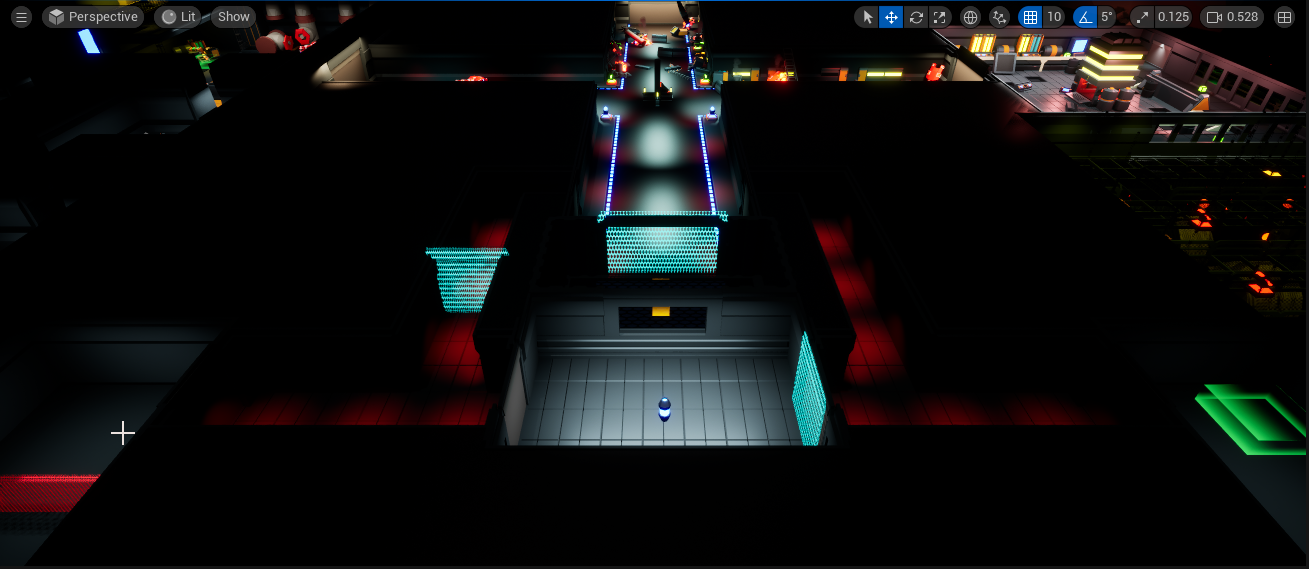
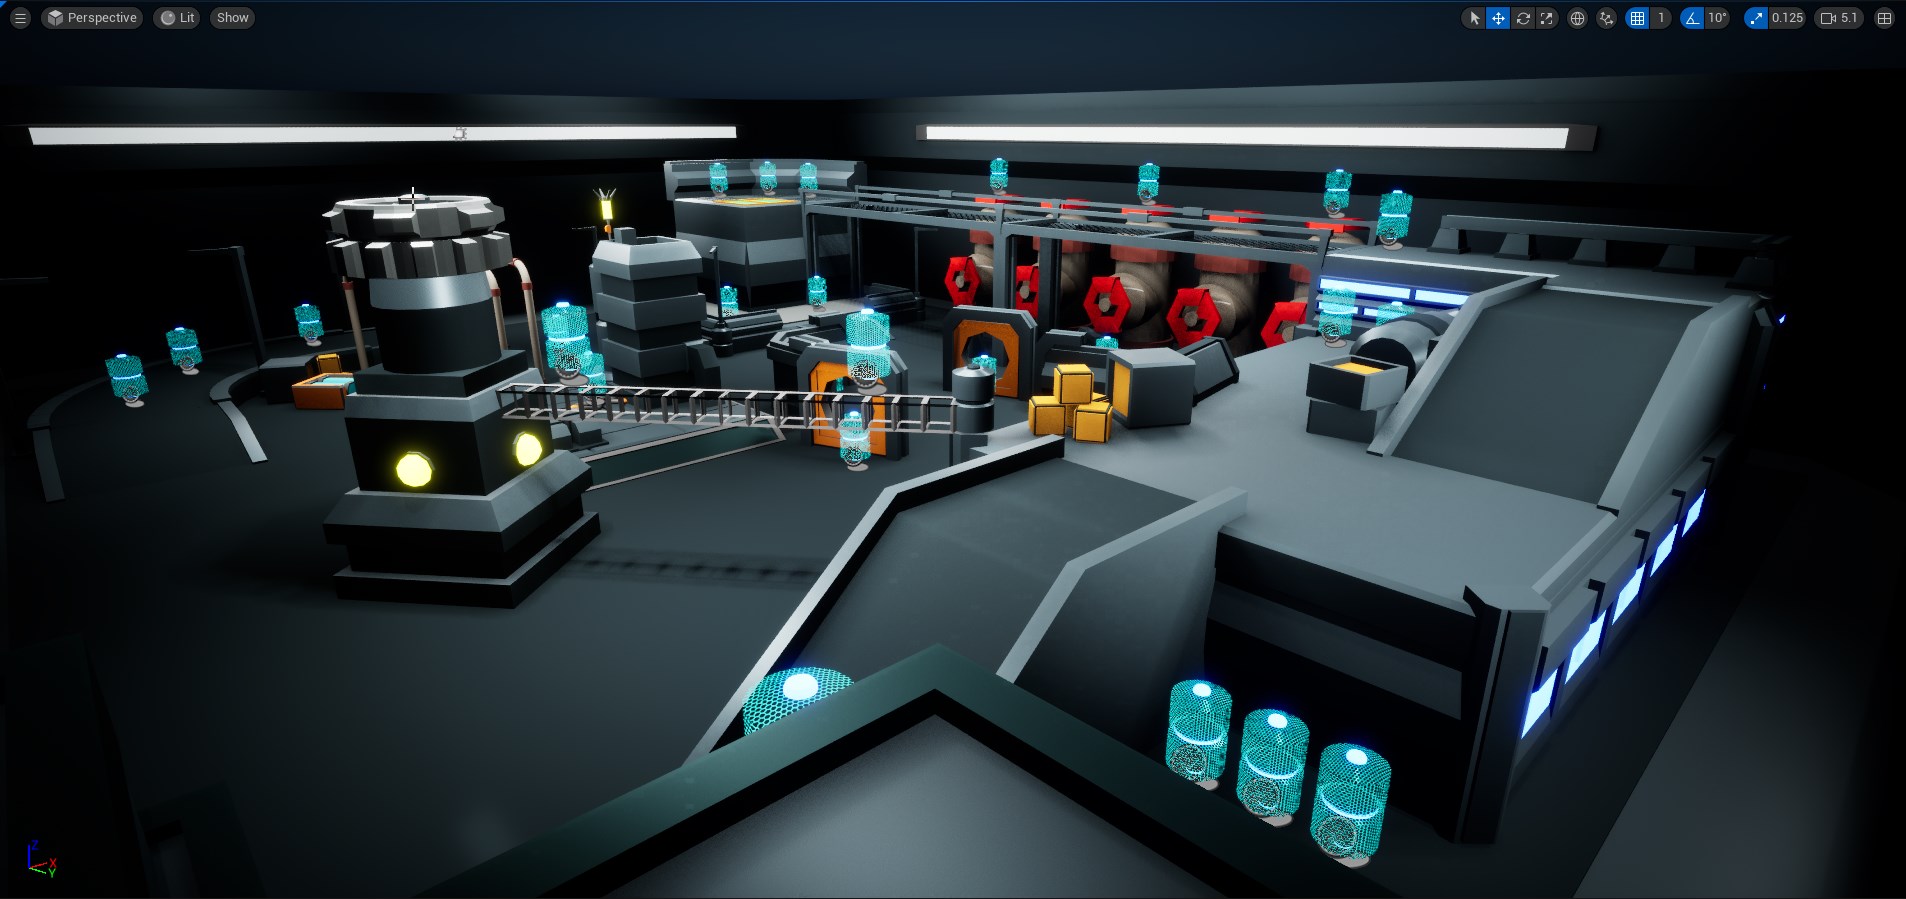
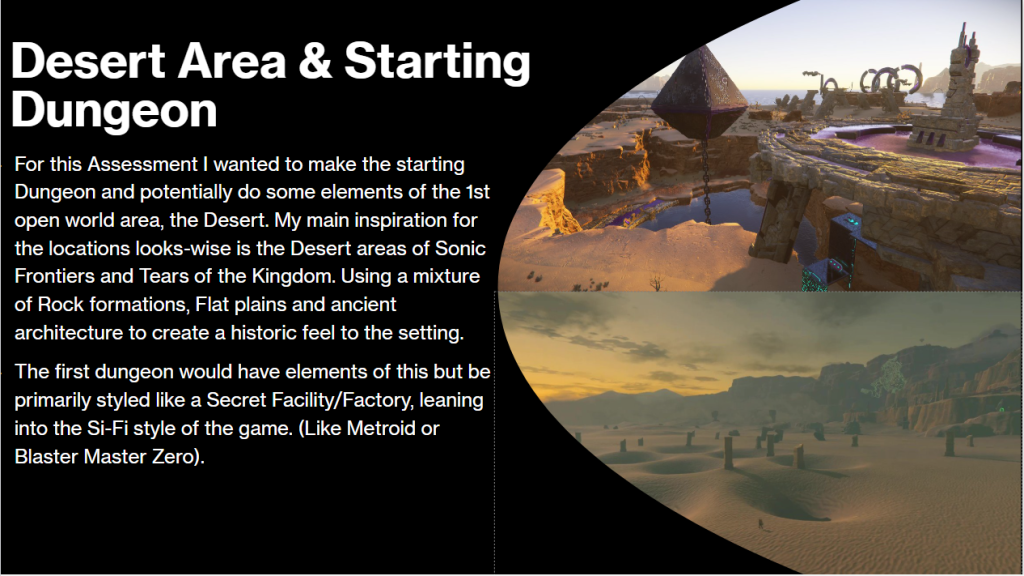
Level Design
The design of the level follows a Military factory idea. The layout and specific rooms are placed in a way to give the impression of a production line that generates the vehicle the player operates, while also including rooms that would handle specific facillities in the factory. A layout of the level is shows below:
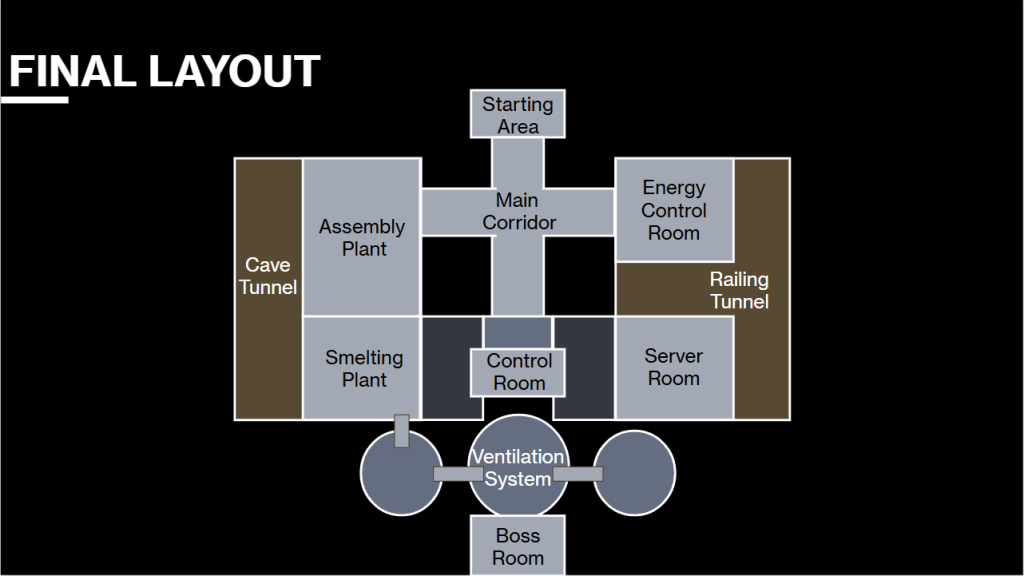
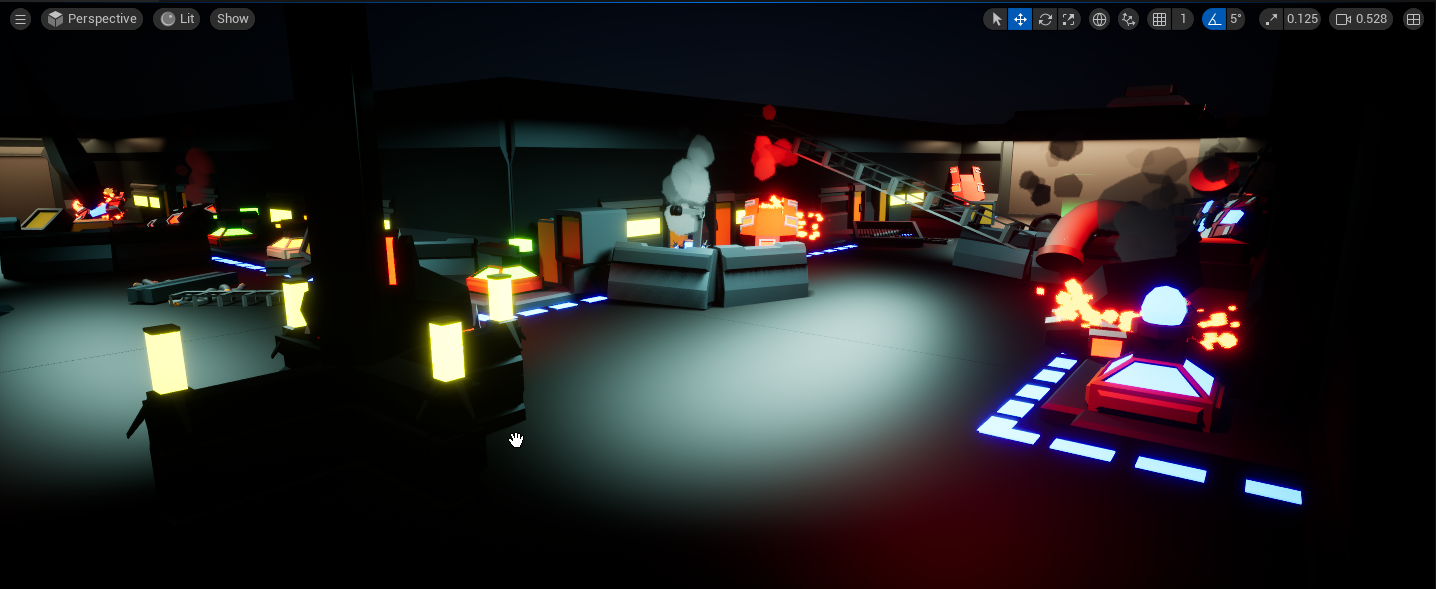
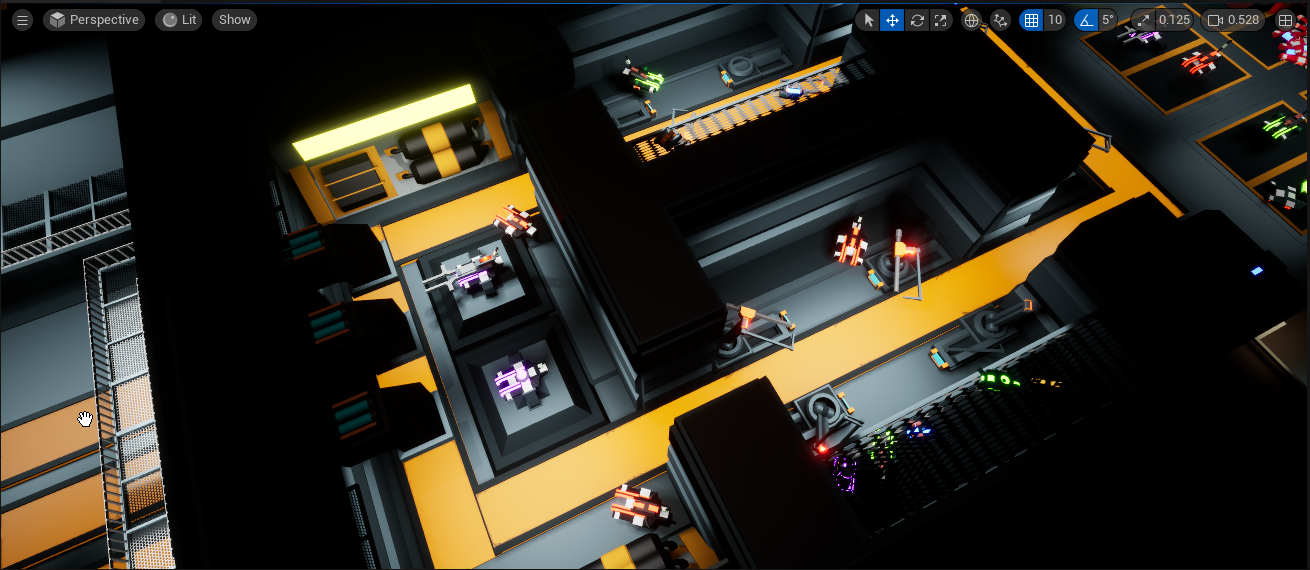
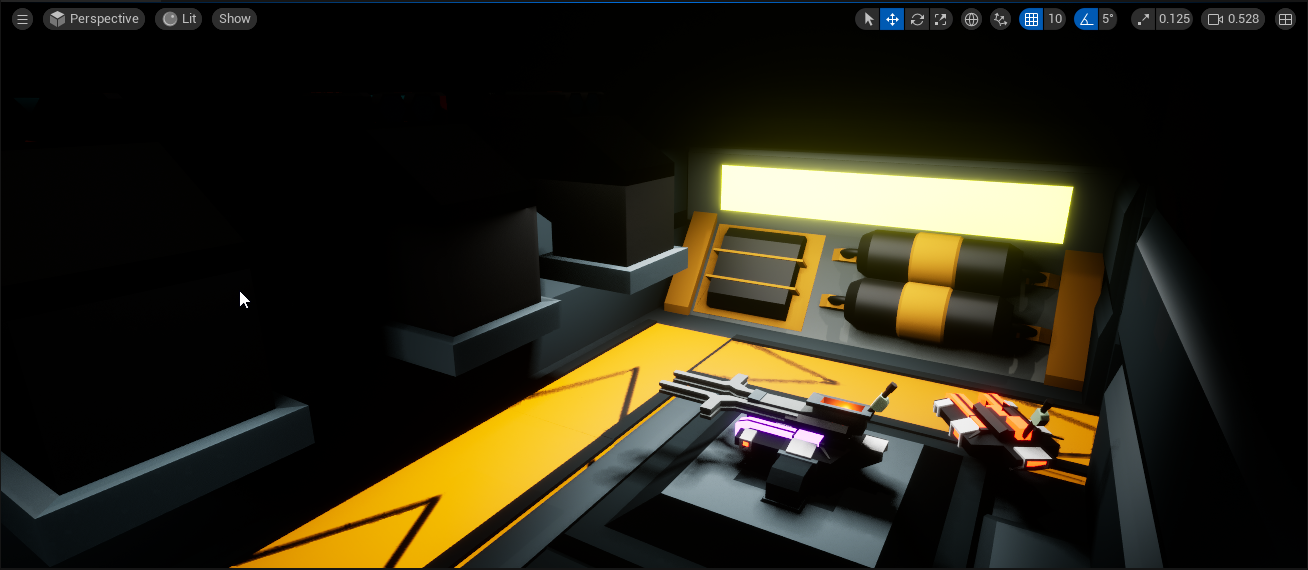
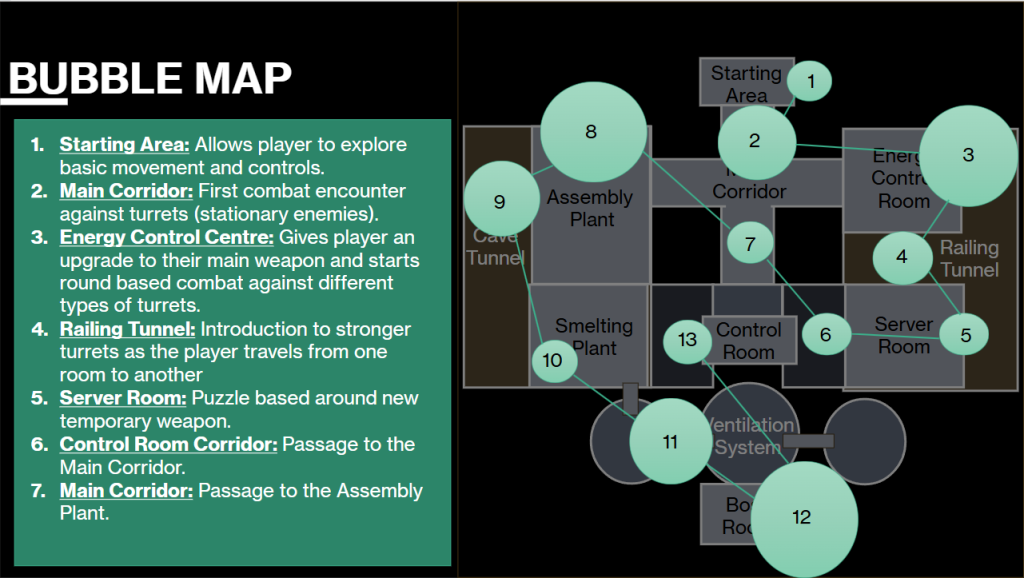
Starting Room & Corridoor
The level starts the player in an isolated hanger with signs of conflict around them (damaged tanks). When the player approaches the door opposite them, they enter the corridoor which has more signs of destruction. In this corridoor the player has their first combat encounter against turrets (single fire, flame and spread variants), giving them a feel for combat with a low difficulty challenge. They are also granted a free Lazer sight power up to make aiming easier. This corridoor leads the player to the next room...
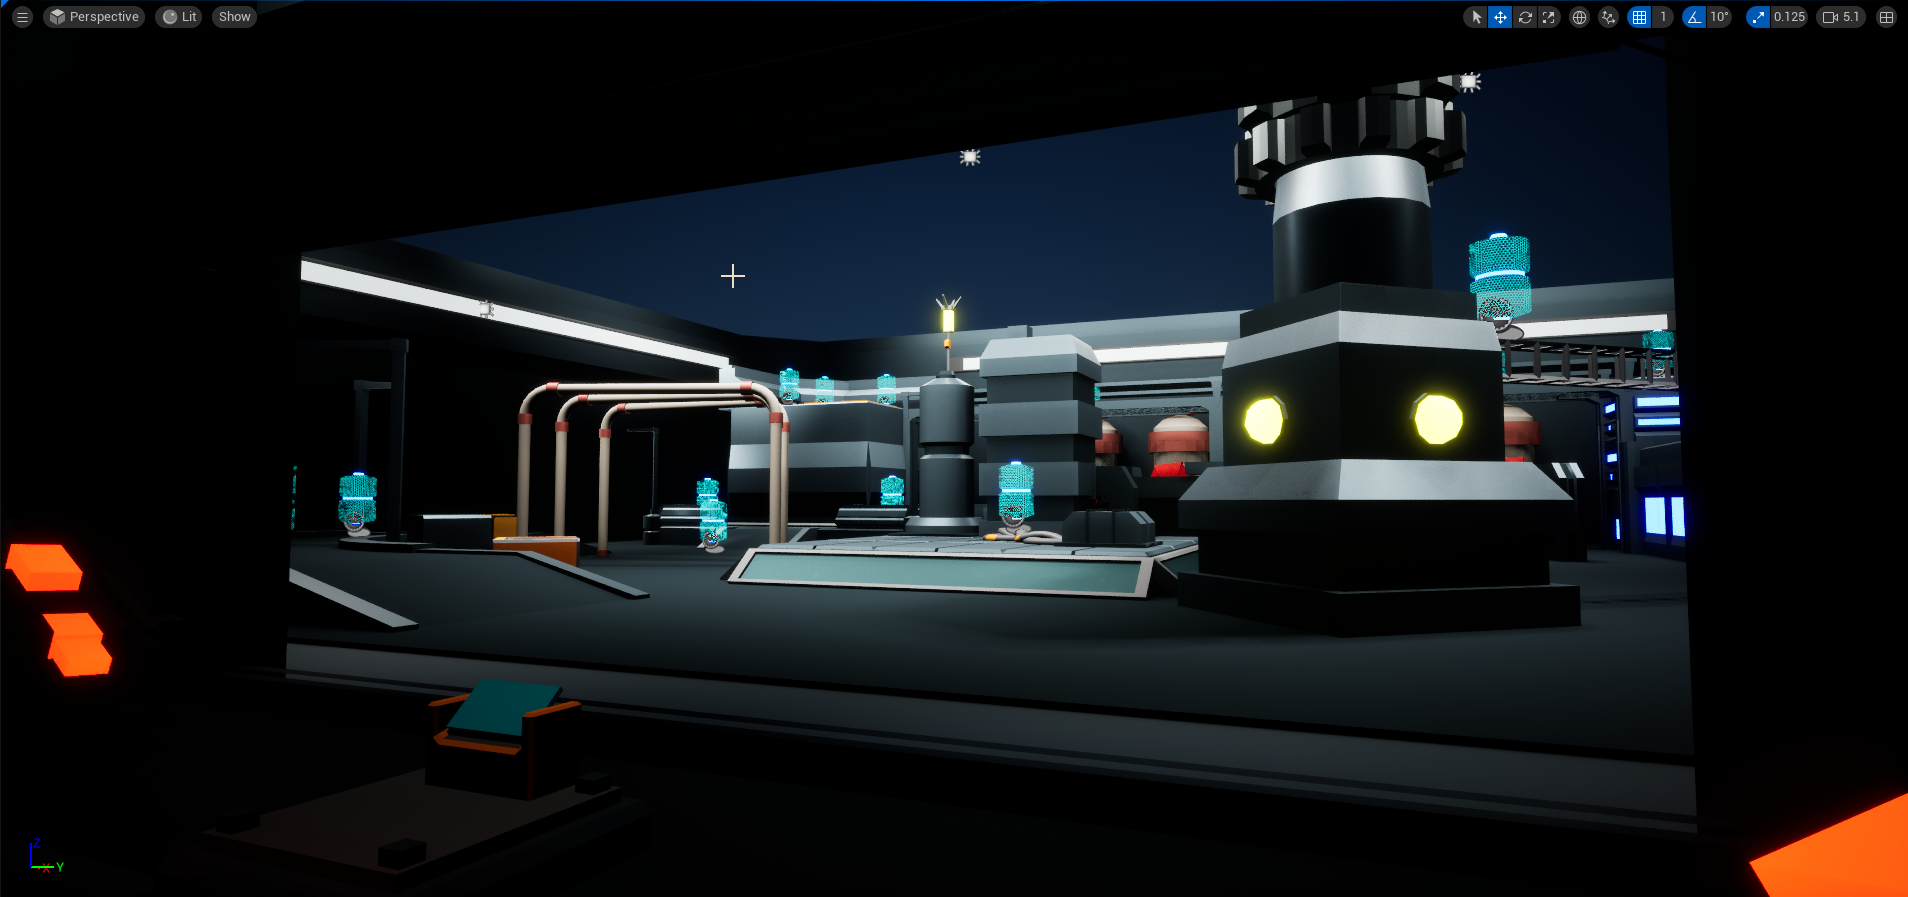
Energy Control Room
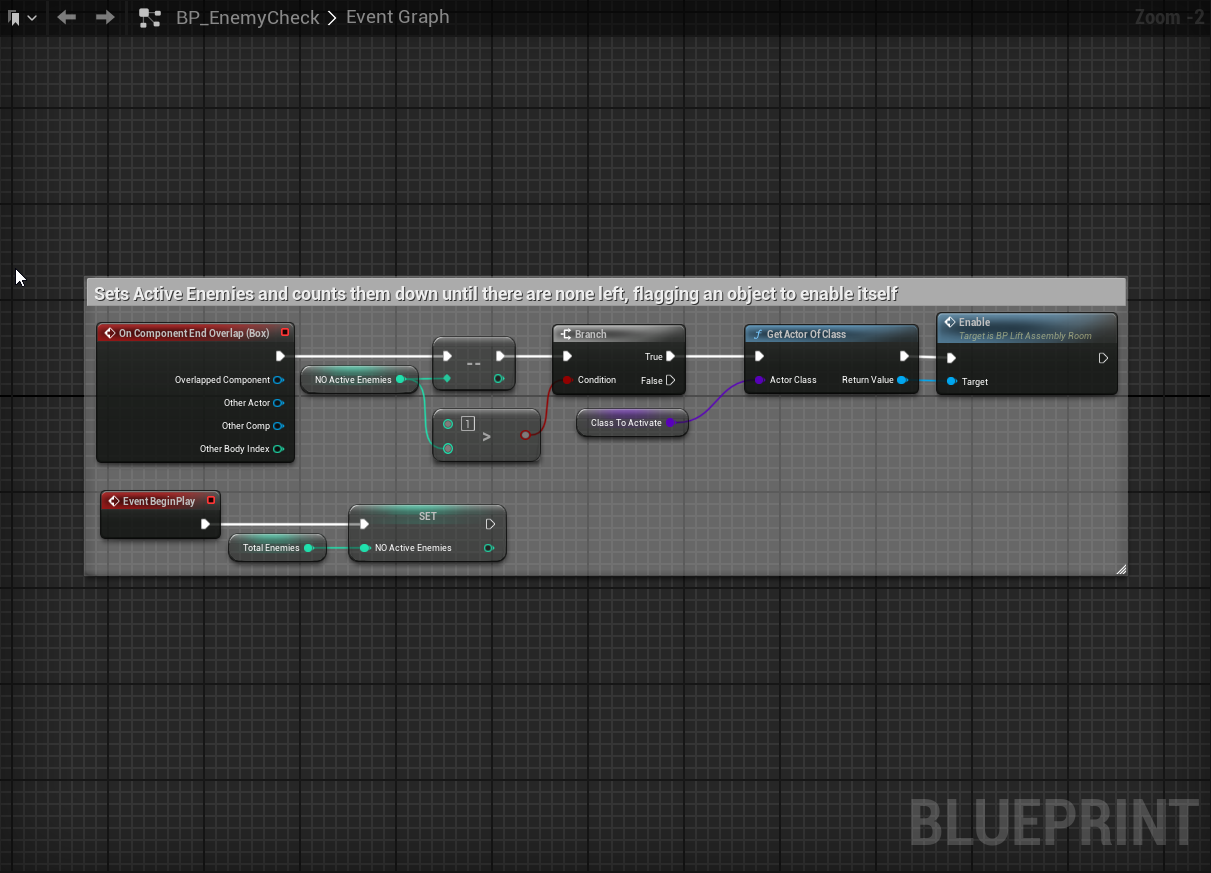
The next room the player comes across is the Energy Control Room which features a mini-boss style of enemy. This enemy triggers after the player obtains an upgrade to their main weapon and work through a series of rounds in which enemy turrets spawn randomly. The room features a centeral area and an upper elevation around the room with health pick ups. Th room also features explosive barrels around the inner area.
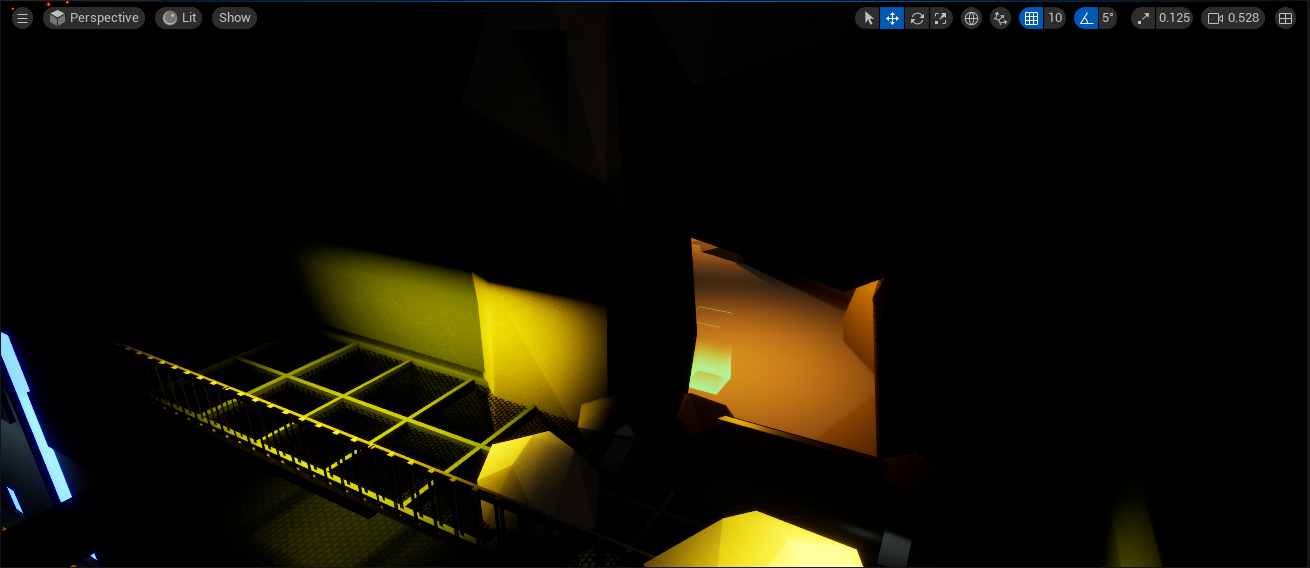
Walkway Tunnel
After the mini-boss is defeated, the player then enters a walkway in a cavern along the side of the facillity. This walkway introduces stronger turrets and presents the scale of the facillity.

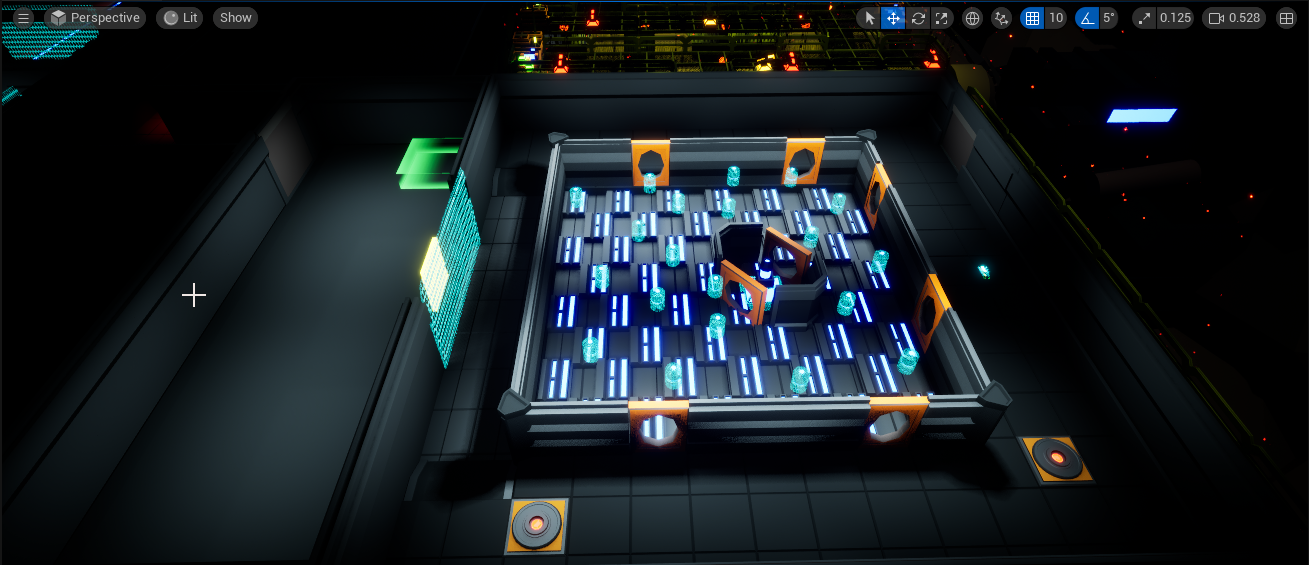
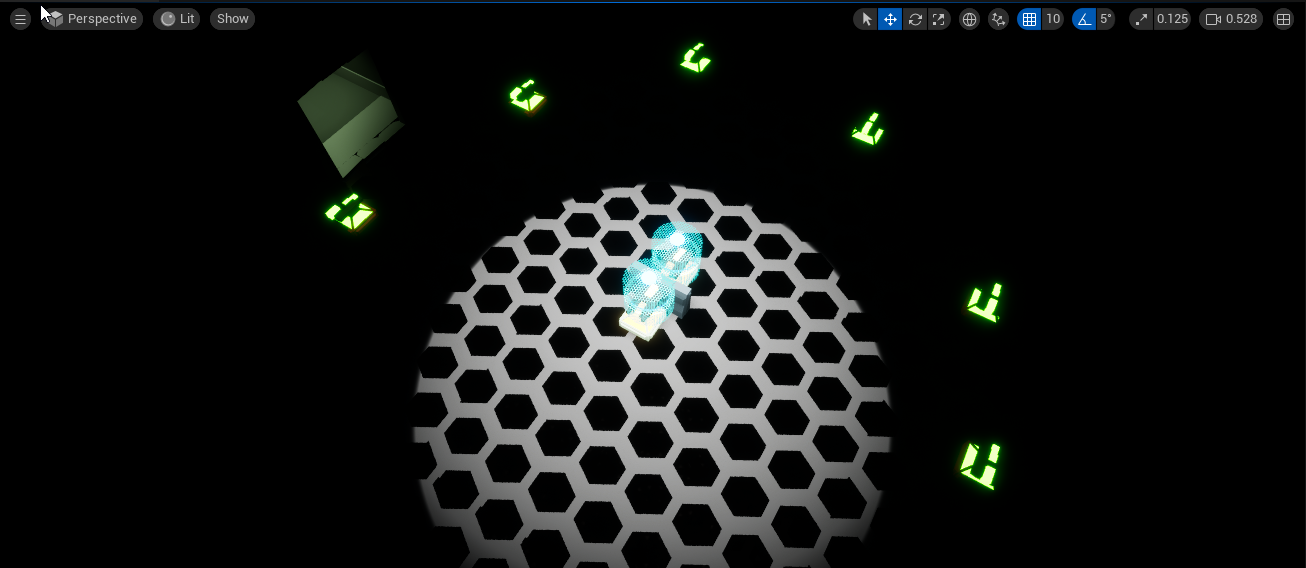
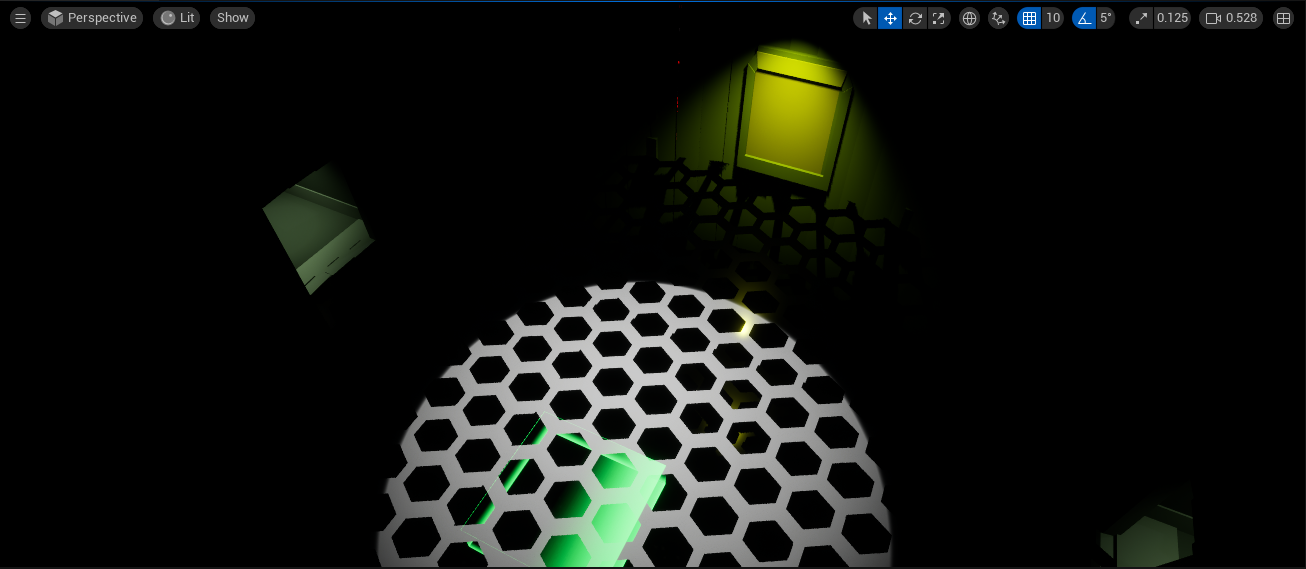
Server Room
The next room is the Server room, which introduces a puzzle revolving around the Electricity weapon. The center of the room has a walled of area of targets with a control device in the center that is tied to a gate at the otherside of the room. The room also features platforms which reset the targets.
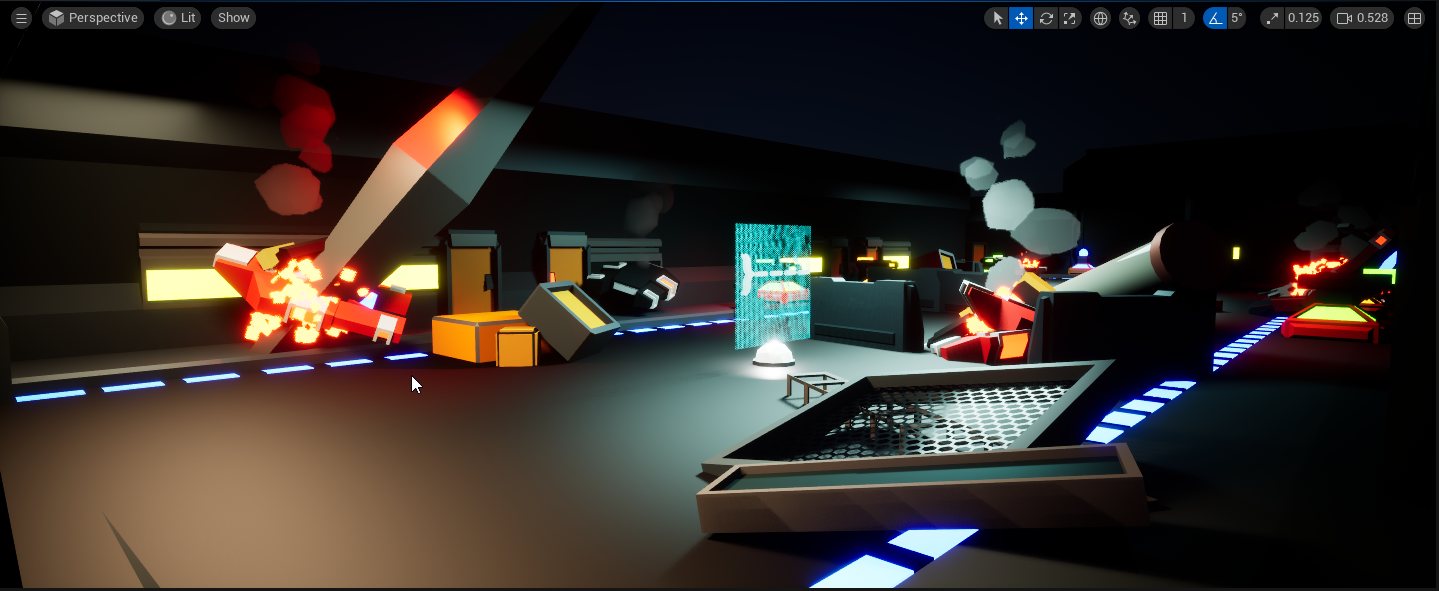
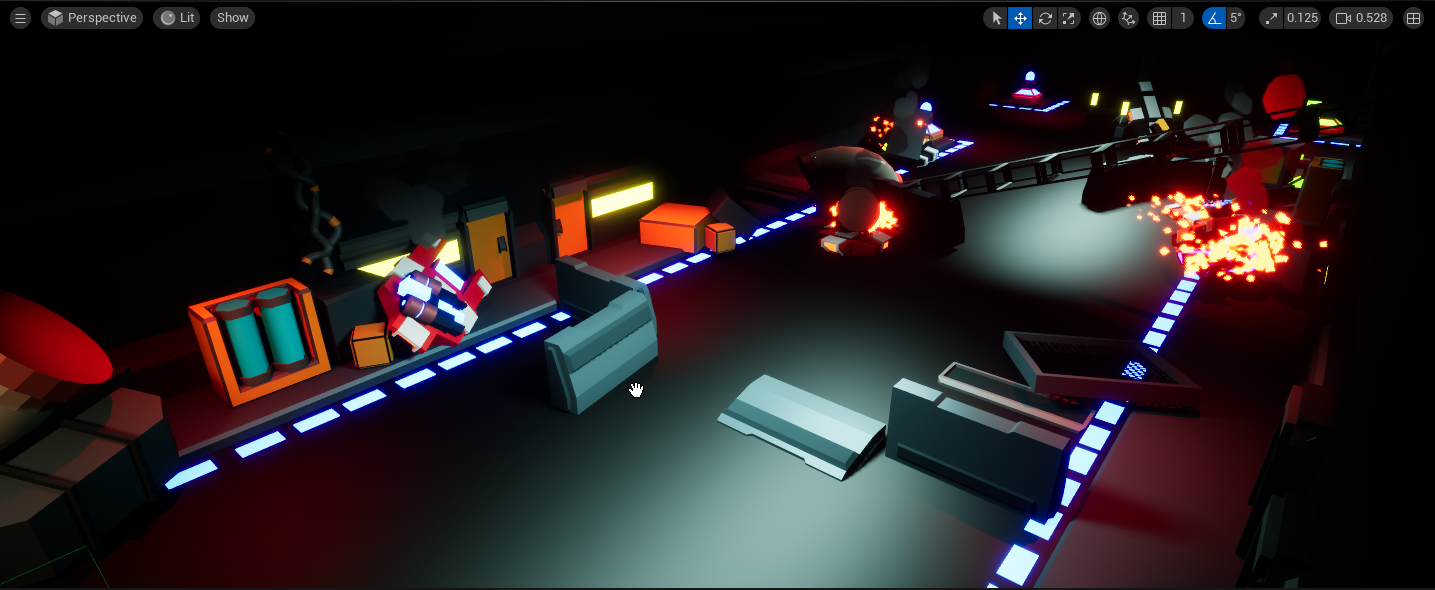
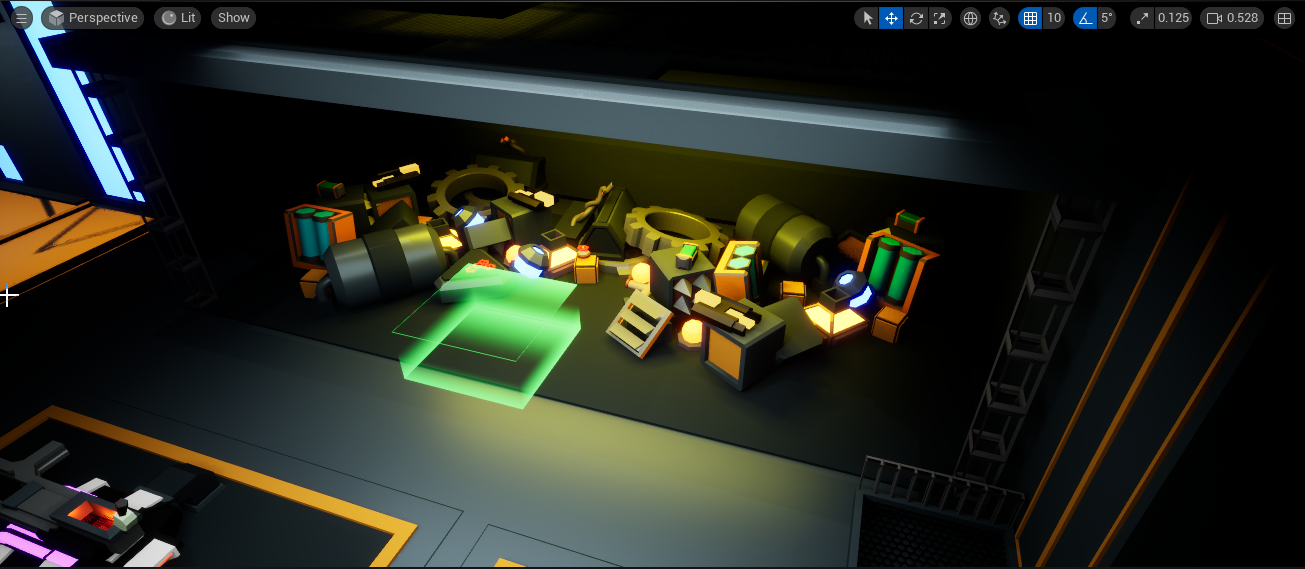
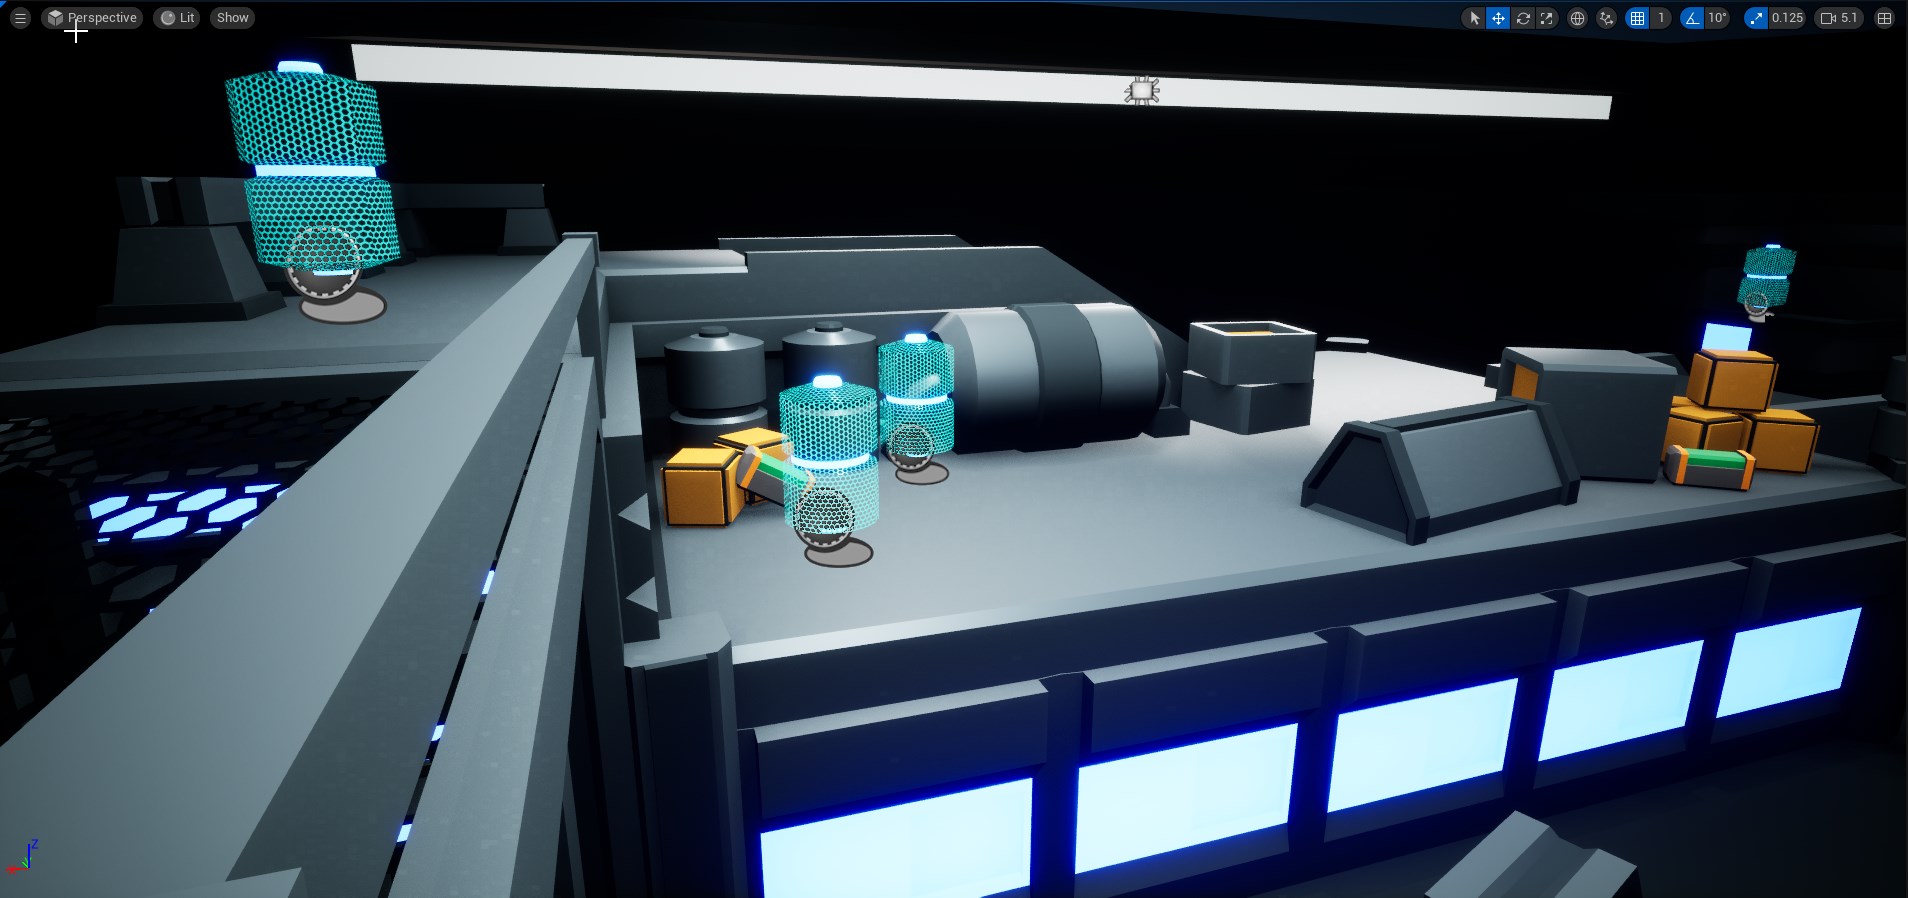
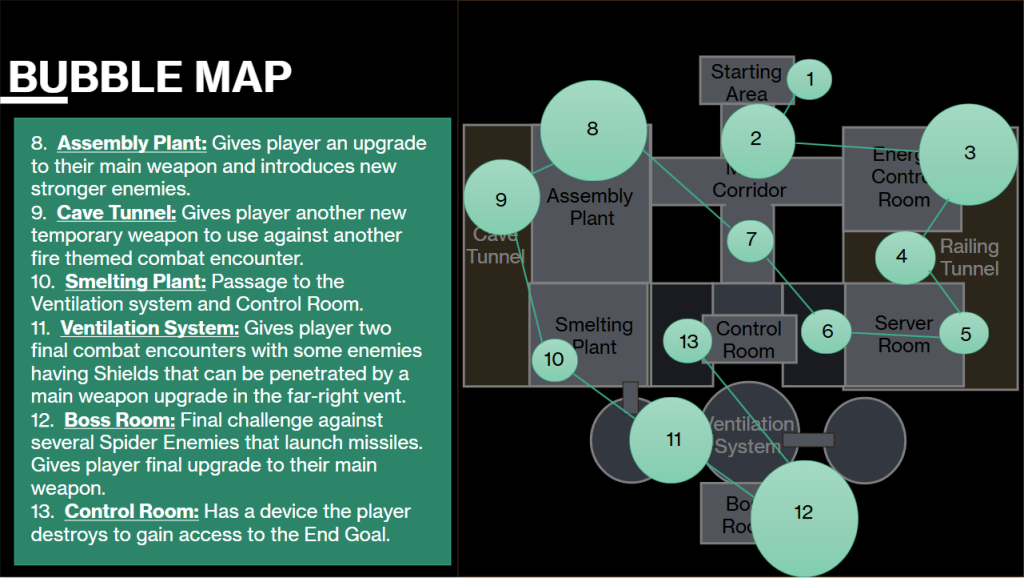
Assembly Plant
The player then travels through the corridoor from before to get to the Assembly Plant. This is the largest room and features several stronger enemies, including mobile enemies. It also grant the player another main weapon upgrade and introduces conveyor belts to the player. Once all enemies are defeated, an elevator to the next area is activated.
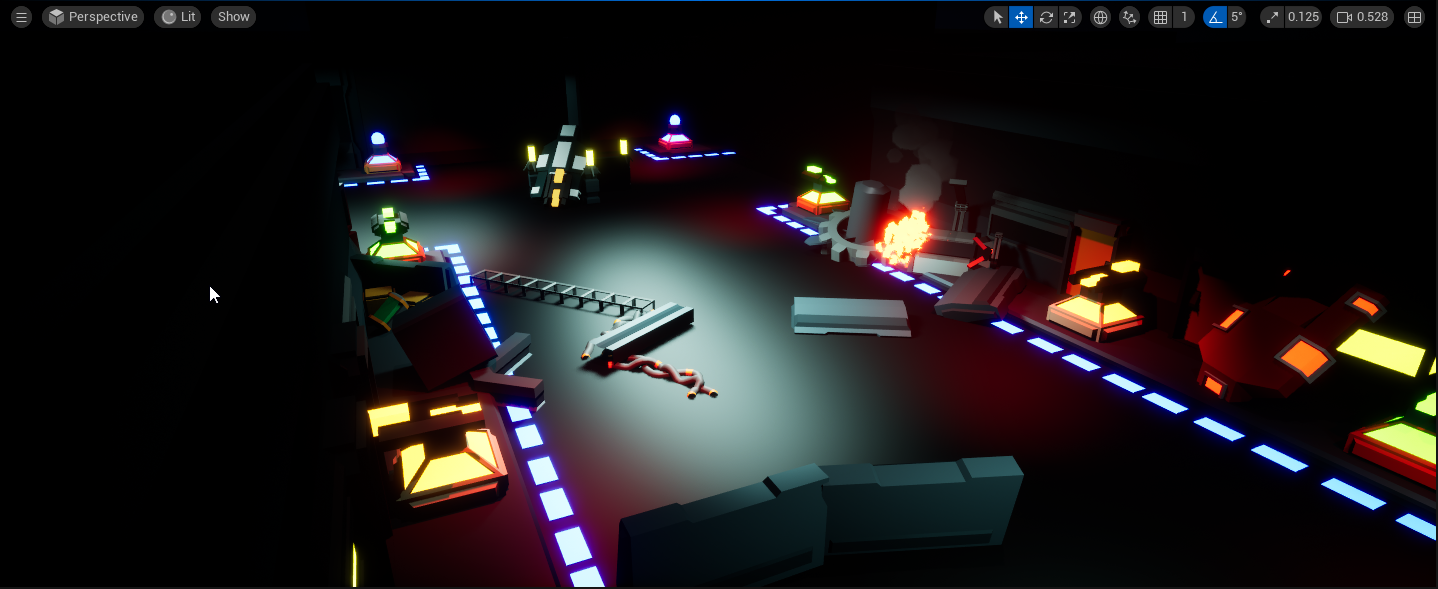
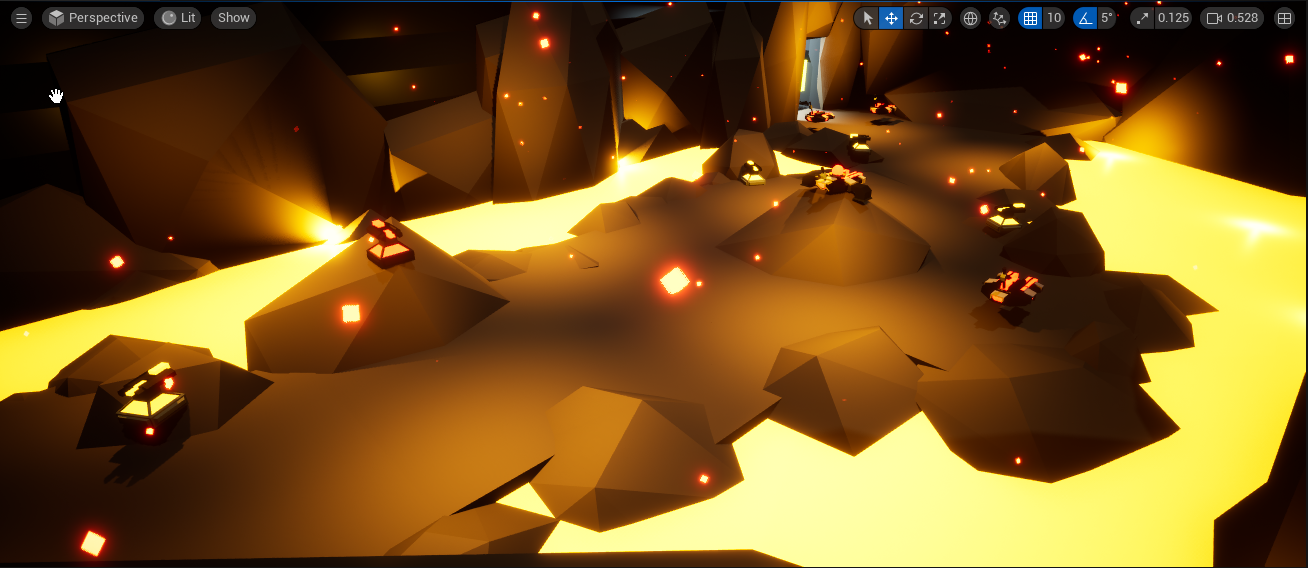
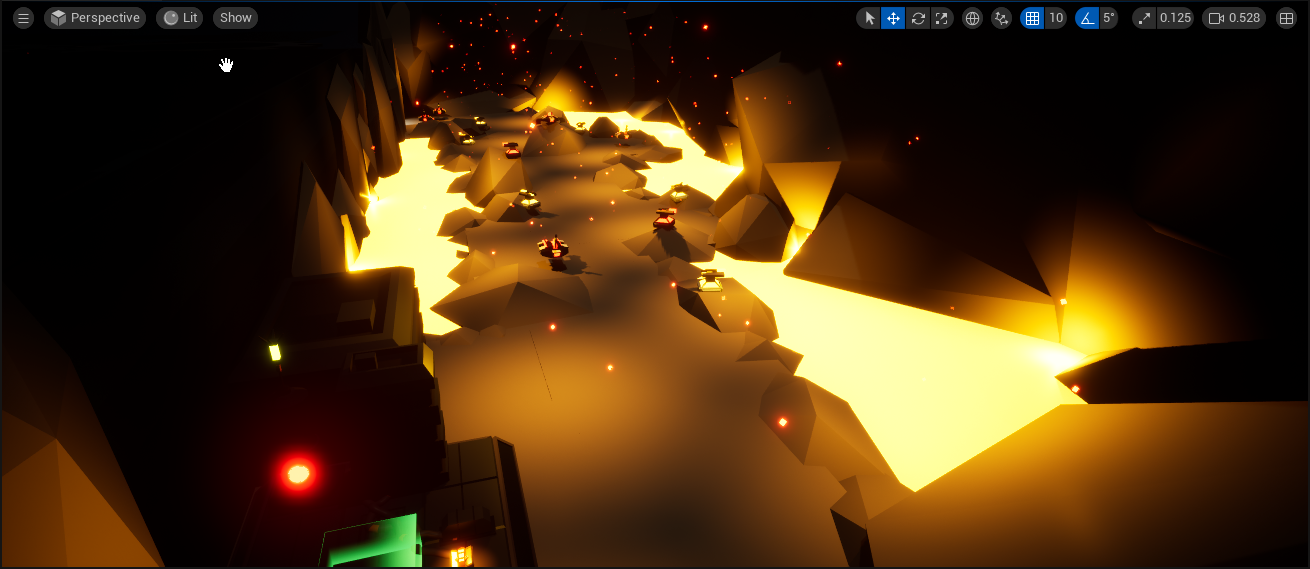
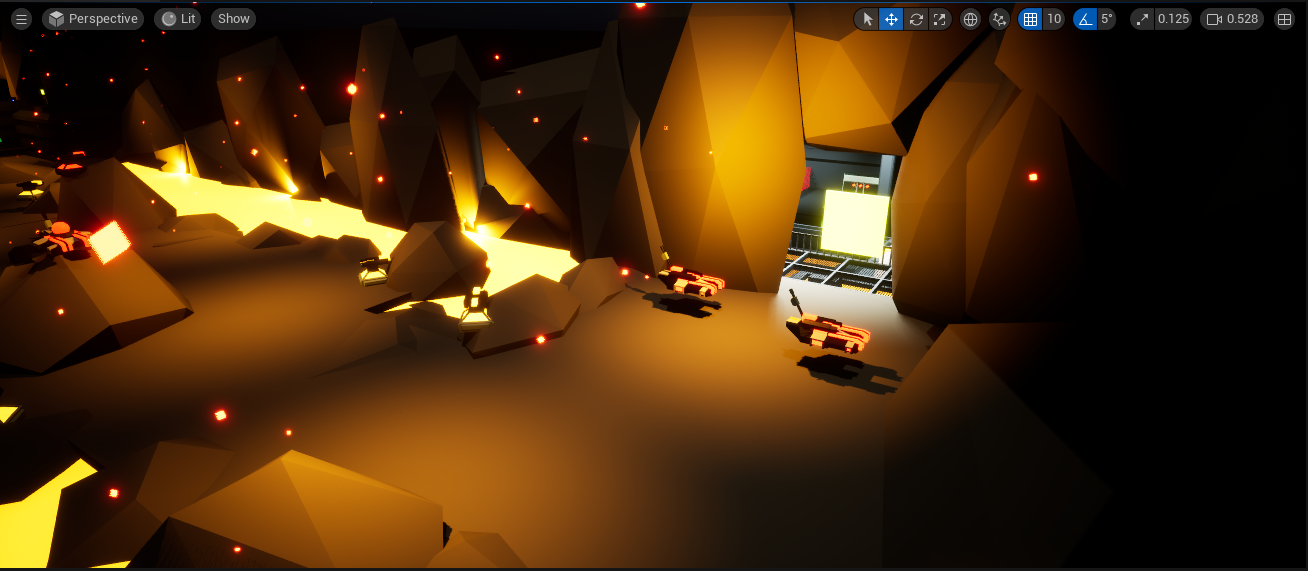
Magma Cave
After the player uses the elevator, they enter the Magma Cave in which they are granted the Shotgun for this area. It features several flame based enemies allong with lava which reduces the amount of space the player can safely drive on.
Smelting Plant
This room connects the next section of the level with the exit which can only be accessed through the use of a specific power up.

Ventilation System
The ventilation system presents the player with a final challenge before the boss of the level. It introduces shields that block player fire and grants the player the Piercing upgrade to their main weapon.
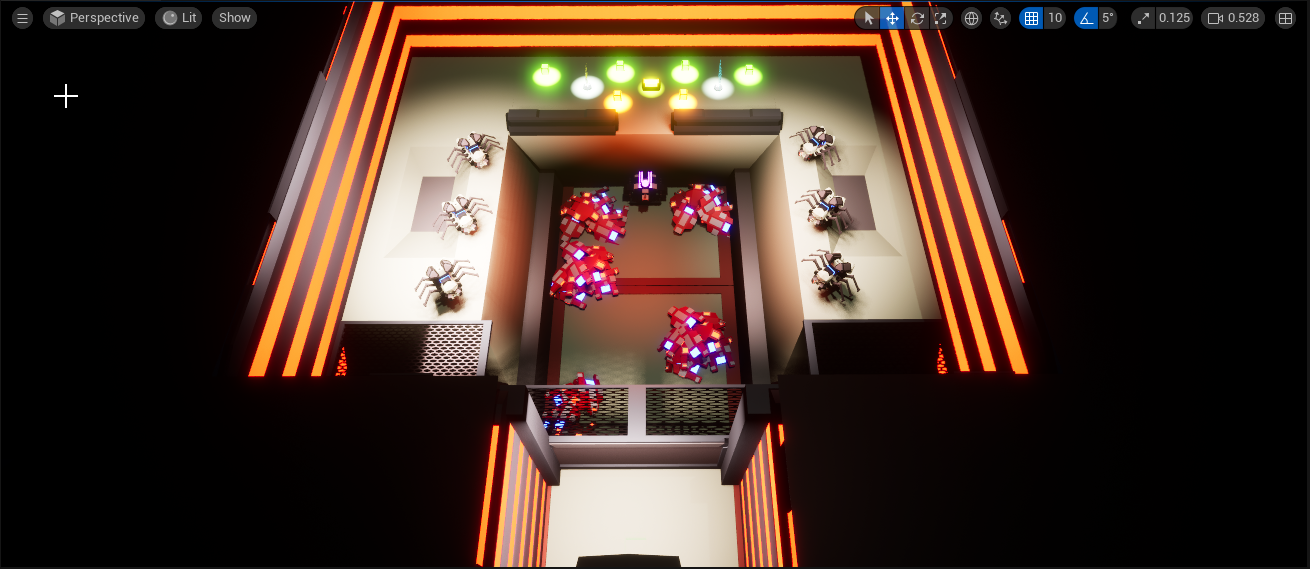
Boss Room
The Boss room is split into an upper and lower area. The lower area forces the player to avoid the enemy attacks while attacking an object blocking the elevator to the upper area. The upper area has the final main weapon upgrade (along with several other pick ups) and the hardest enemy the player has encountered, the Spider enemy.
Control Room
When the player returns to the Smelting Plant, they now have the abillity to activate a gate that reqires the Tri shot upgrade. This leads the player to a Control device which is blocking the exit. After touching the exit, the level ends.
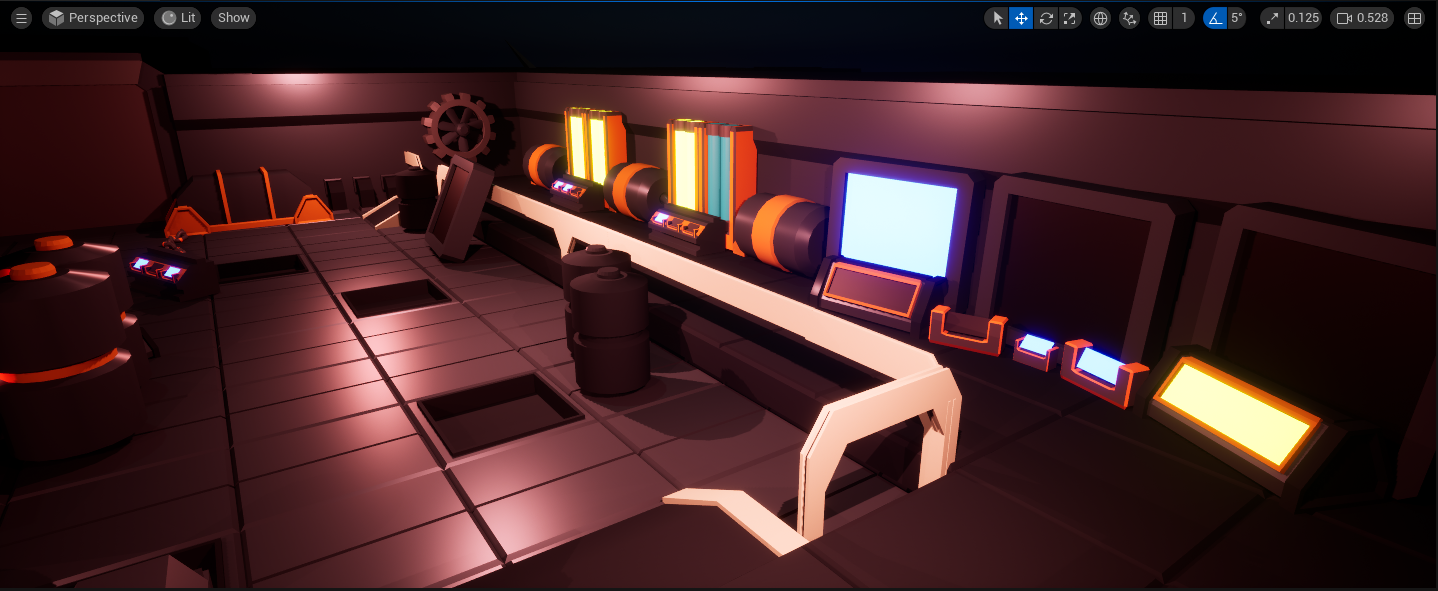
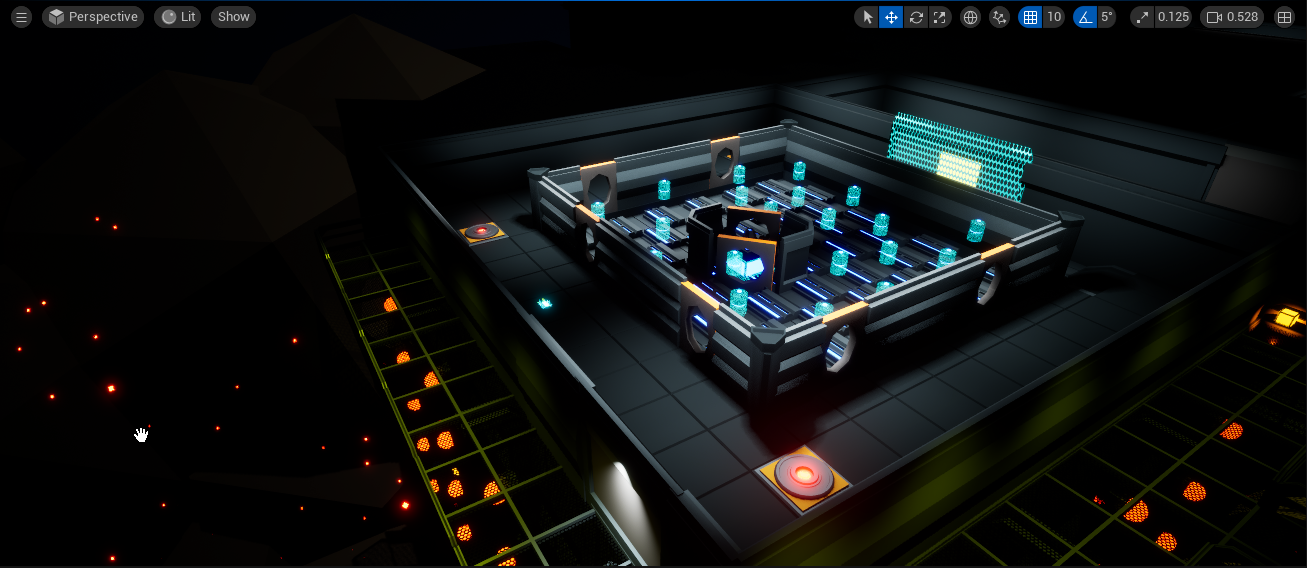
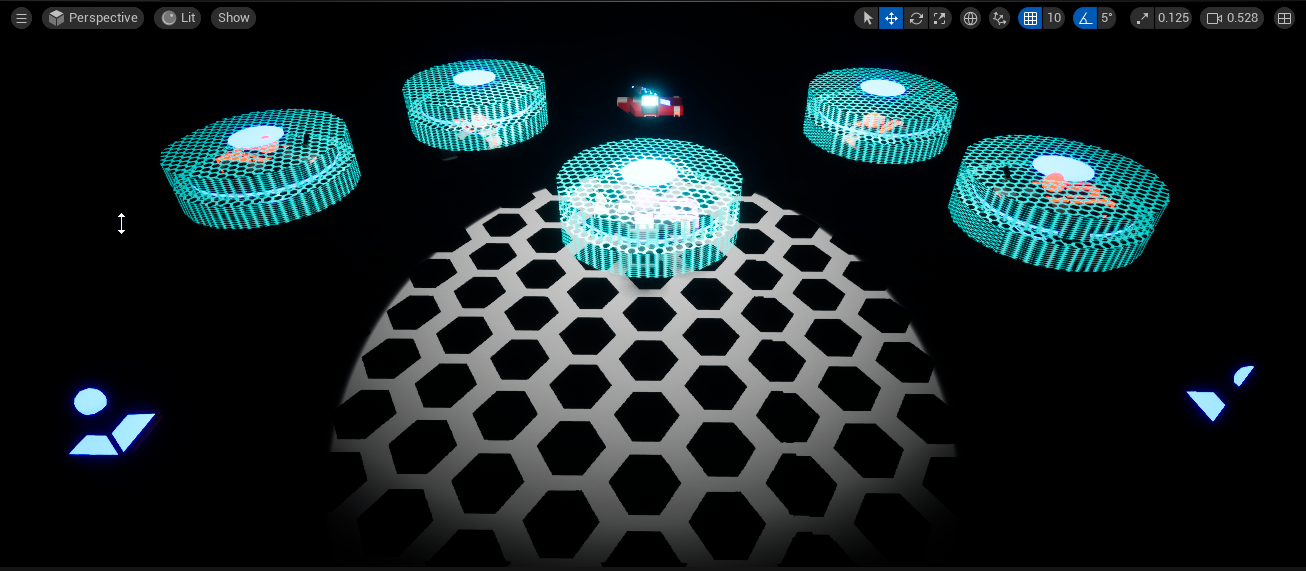
Testing Range
As you have likely seen from other videos, this is the Testing Range which is a room designed for testing mechanics and interactions. The area is designed to have several distinct areas, elevations and challenges to test weapons against.

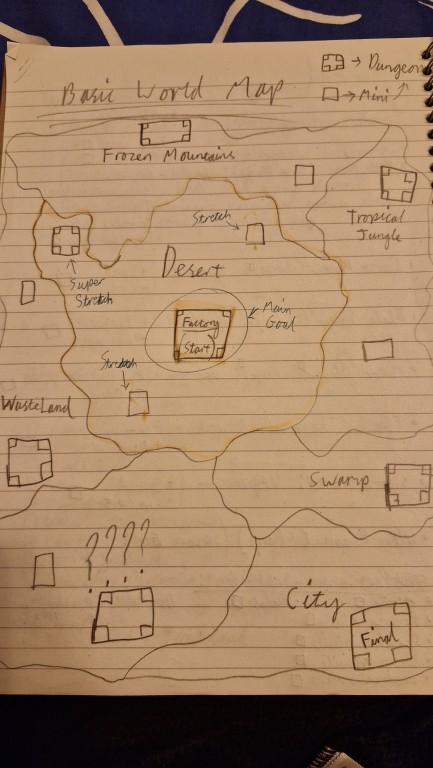
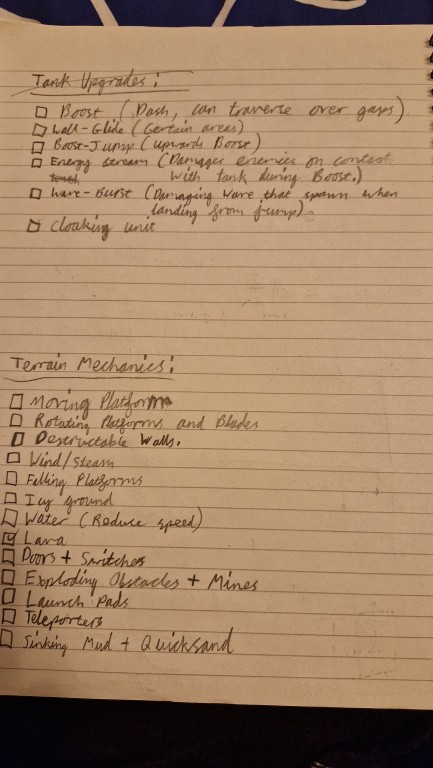
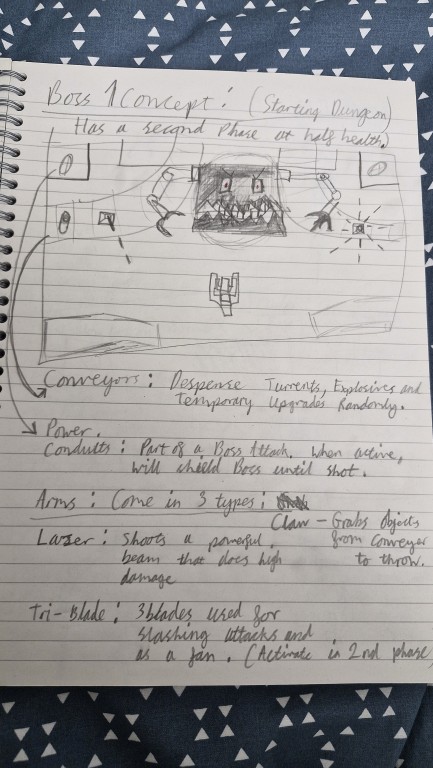
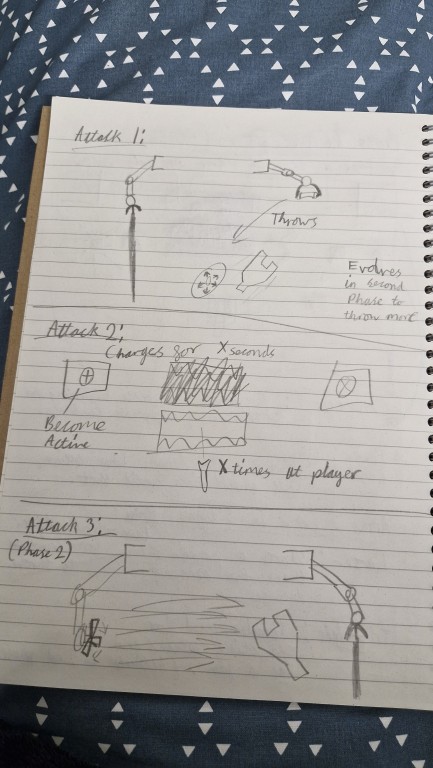
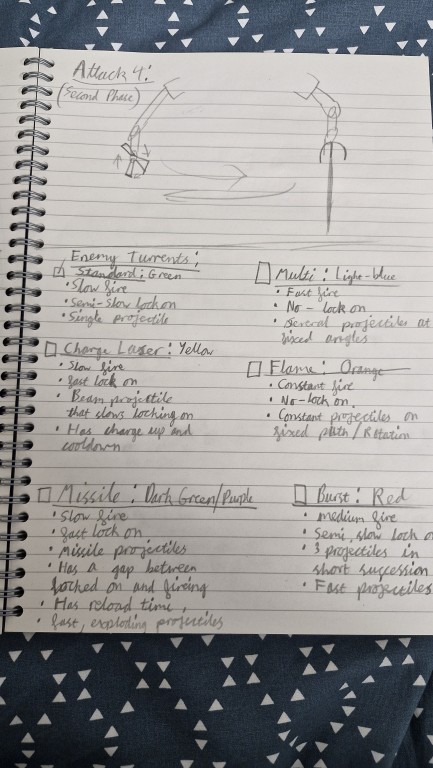
Design Documentation
The following images are the Design Documation for the project.


Ideas & Scetches
These last few images are of scetches and ideas I had during development of the project.